Brand kit

How to setup your brand kit in Senja

Brand Kit is where you save your brand assets — logos, colours, fonts, and more. Anything you add here can be used as a default across your forms, widgets, and Wall of Love, so you're not setting things up from scratch every time.

This feature is available on Senja paid plans: Starter and Pro.

What's in brand kit

  • Logos — used as defaults in forms and Walls of Love

  • Spokespeople — avatars used as defaults in your forms

  • Your Templates — image templates for testimonial notifications and Zaps

  • Welcome Videos — shown on your form welcome page

  • Thank You Videos — used in manual or automated emails and on your form thank you page

  • Colors — set a primary color, text color, rating color, and share page color

  • Fonts — used as defaults in forms and Walls of Love

How to set up your brand kit

  • Go to your Brand page: https://app.senja.io/studio/brand

  • Click Add new under the section you want to set up

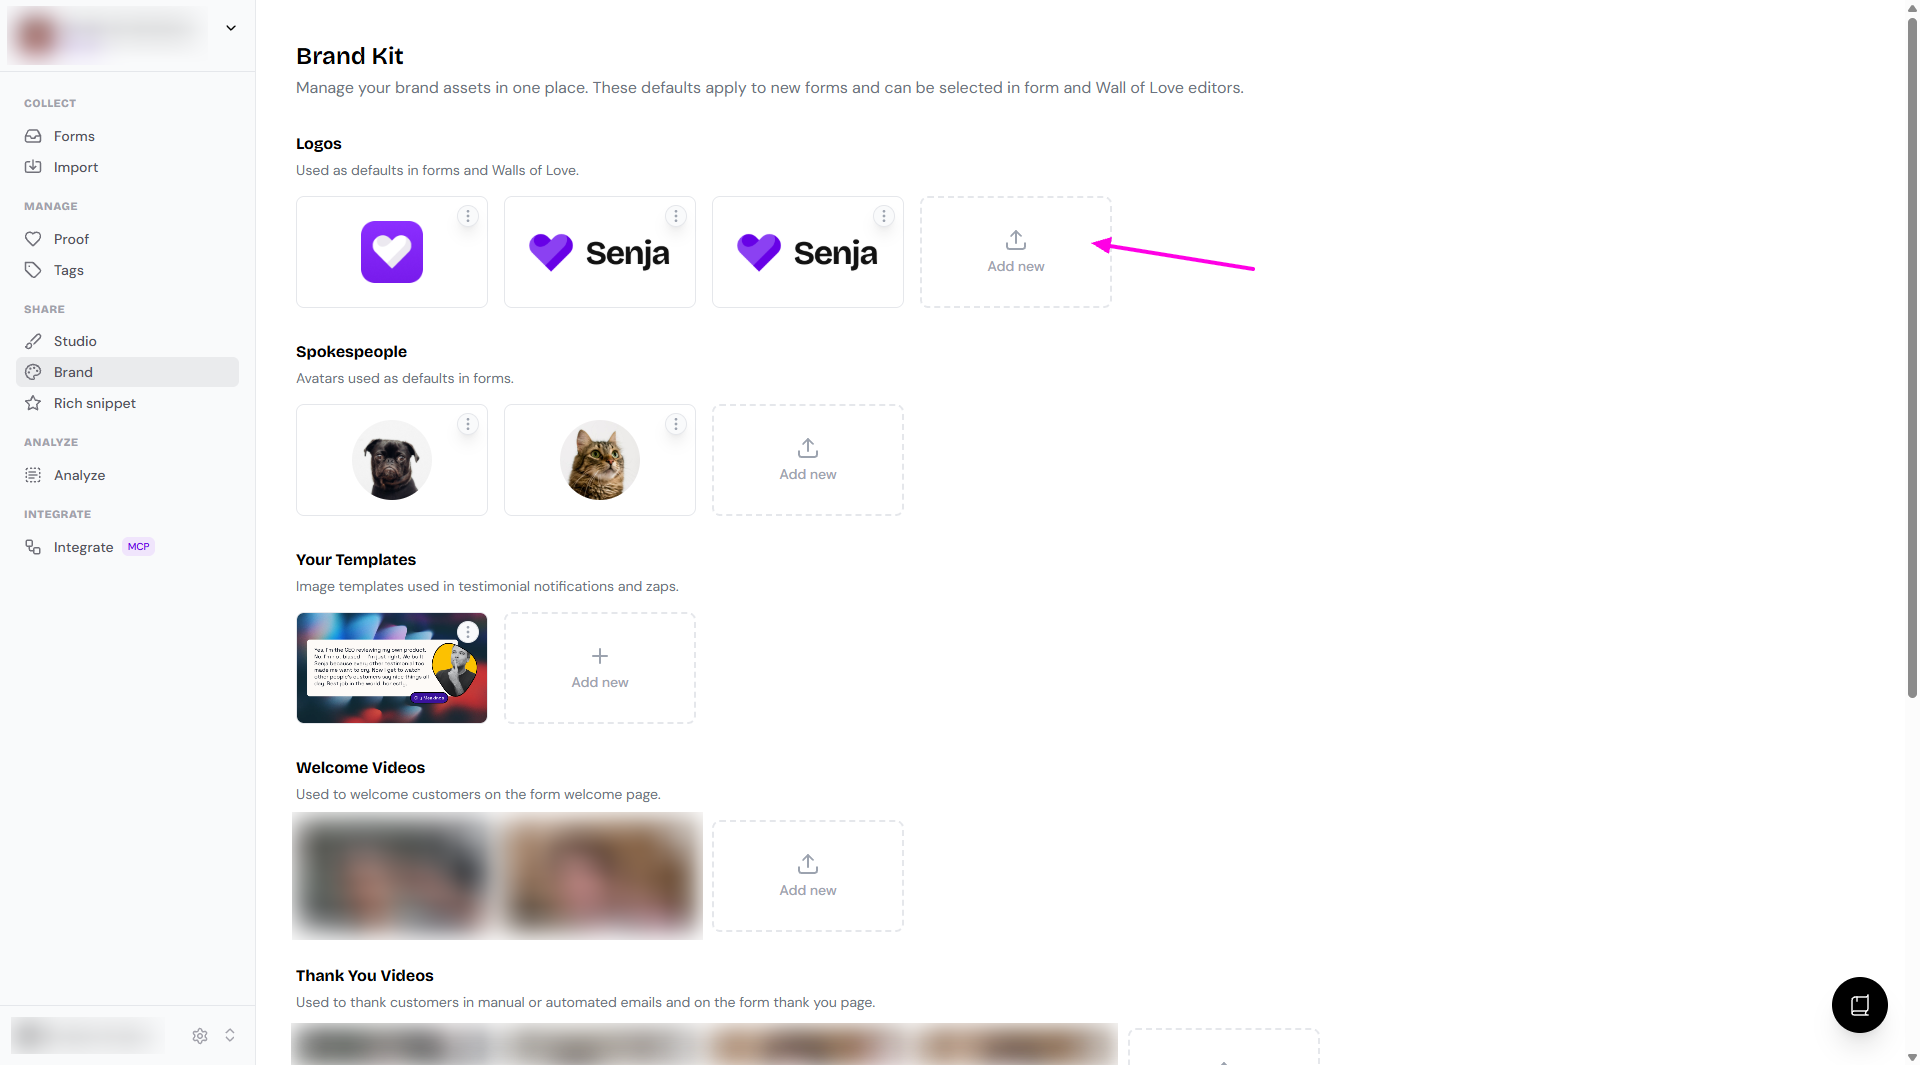
  • Upload your asset or enter your details

  • Click Save (for some elements, there will be no Save button)

How to remove an asset from your brand kit

  • Go to your Brand page: https://app.senja.io/studio/brand

  • Click the 3-dots on the top-right of your asset box

  • Click Delete

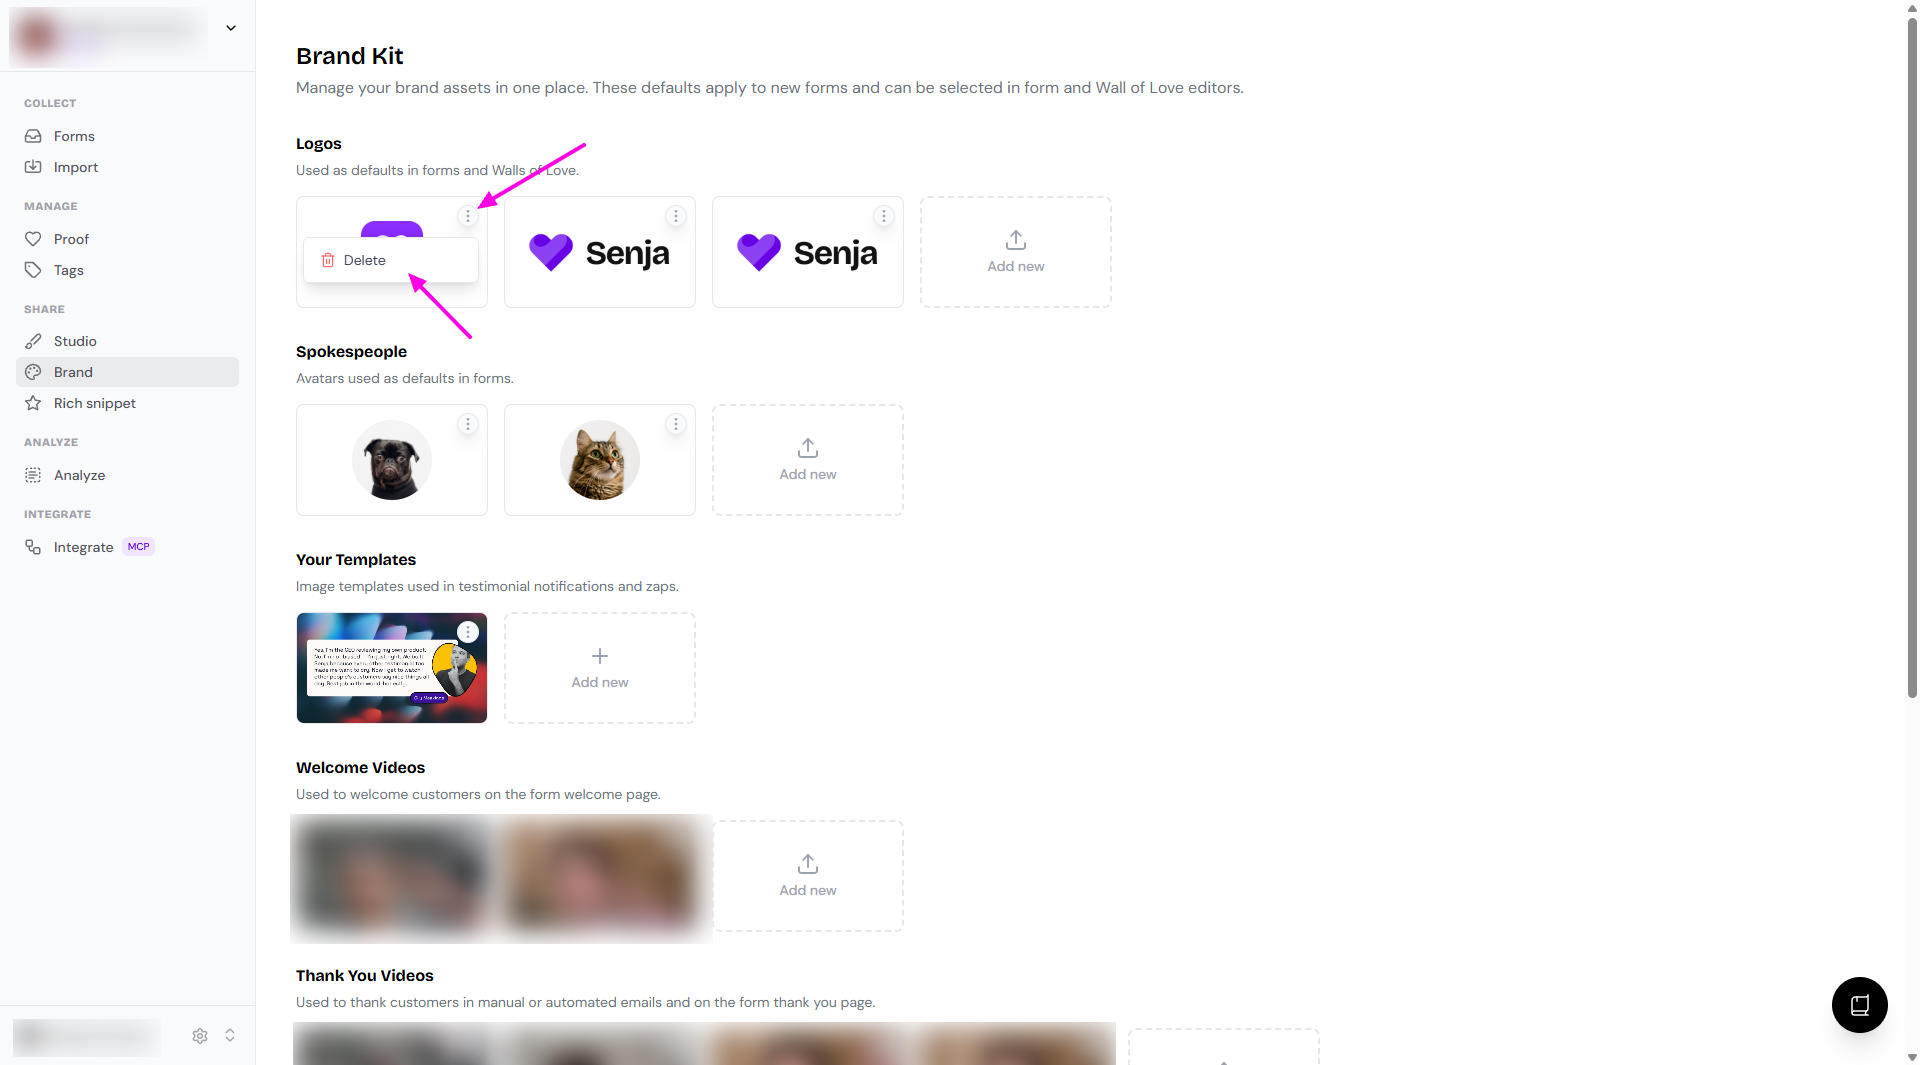
  • On the popup prompt, click Delete to confirm the removal

More on logo and spokespeople

  • When you add a logo or spokesperson avatar to your Brand page, you will see the option to use it in your form's questions

    • Open your form and see the Form tab

    • Choose Design subtab to choose the Spokesperson avatar and Logo to display in the questions

    • To remove the spokesperson avatar and/or logo, click on the currently chosen image - it will deselect the avatar/logo

      • How it looks without spokesperson avatar

      • How it looks without logo

      • How it looks without both

  • It will be available also on the Emails setup in your form's editing modal

    • Open your form and go to Emails tab

    • Click Email settings subtab

    • The same way, you can choose your spokesperson avatar and logo or remove them all the way

  • If you disable the thank you email on your form, you can send a thank you message from your Proof page and it will show the spokesperson avatar and logo

    • Choose the testimonial from your Proof page: https://app.senja.io/

    • Click Thank customer

    • Review the email before clicking Send thank you

    • You can remove the spokesperson avatar and the logo by clicking the ✖️ sign on the top right side of the thumbnails

More on welcome videos

Welcome video is available in your form, under Form tab.

  • Scroll down to Welcome page

  • Record or upload a video, and the video will be added automatically to the Brand page

  • If you want to use another welcome video:

    • Click Change welcome video

    • You'll have the option to record a new video, Upload a video, or select from the welcome videos saved in your Brand page

  • If you want to remove the welcome video:

    • Click Remove welcome video

    • If you have recorded any welcome videos, it will stay in the Brand page for future use

You can add the welcome videos from Forms and it will be saved in your Brand page. Vice versa, you can add the video from your Brand page, to use it later in your Forms.

More on thank you videos

Thank you video is available in your form, under Emails tab.

  • Click Thank you email subtab

  • Record or upload a video, and the video will be added automatically to the Brand page

  • If you want to use another thank you video:

    • Click Change thank you video

    • You'll have the option to record a new video, Upload a video, or select from the thank you videos saved in your Brand page

  • If you want to remove the thank you video:

    • Click Remove thank you video

    • If you have recorded any thank you videos, it will stay in the Brand page for future use

You can add the thank you videos from Forms and it will be saved in your Brand page. Vice versa, you can add the video from your Brand page, to use it later in your Forms.

More on colors

  • You can add a new color using the HEX code

  • Set the purpose (None, Primary, Text, Rating, Share page)

  • Click Save

  • To use the colors in your form:

    • Open your form and open the Form tab > Design subtab

    • Click on the color thumbnail

      • You can choose from the brand colors saved in Brand page

      • You can use a completely different color

      • You can add more brand colors from this modal, and it will be automatically saved in your Brand page

More on fonts

  • You can choose a font from the Google Font list

  • Set the Font type (None, Heading, or Body)

  • Click Save

  • To use the fonts in your form:

    • Open your form and open the Form tab > Design subtab

    • Click on the font dropdown

      • Your brand fonts will be on the top of the list

      • You can use a completely different font that is not on your brand fonts

Was this helpful?