
How to use the Customers page
The Customers page lists everyone who paid you through Stripe, with the testimonials they’ve left. From there you can invite customers for a testimonial, thank them, and link a testimonial to the right customer when Senja didn’t match it.
This feature is available to any Senja plans (Free, Starter, and Pro). The Customers page needs Stripe connected, see How to connect Stripe to Senja.
Find your customers
Every customer who paid through your connected Stripe account shows up here.
Click Customers on the left side bar, right under your name
Click a column header to sort the list by that column (ascending/descending)
How testimonials are matched to customers
Senja links a testimonial to a customer when the testimonial’s email matches exactly to the email address used in Stripe billing details
If the email address in the testimonial doesn't match the one from Stripe (for example personal versus work email), the testimonial won’t match on its own
When Senja finds a testimonial that could belong to a customer, it shows it as a Possible match
It detects other information linked to the testimonial: name, website address, etc.
Possible matches only point to testimonials that aren’t linked to another paying customer yet
Change a customer’s name or email
Stripe shows the billing name and email, which is sometimes a company card or an accountant rather than the real customer. Edit them to show the person you actually work with.
Click the name of the customer
Edit the name directly
This edit will be shown directly in the Customers page, and automatically updating the customer's name in your Sales Widget
Attach a testimonial to a customer
Attach a testimonial by hand when it belongs to a customer but used a different email.
When attaching a testimonial with different email address, the Customers page will use the email address attached to the testimonial
A Stripe logo will appear next to the updated email address, hover on it to see the billing email address
There are 2 ways of attaching a testimonial to a customer.
Filtering by "Possible match"
Click the dropdown that show Any testimonials
Choose Possible match from the dropdown
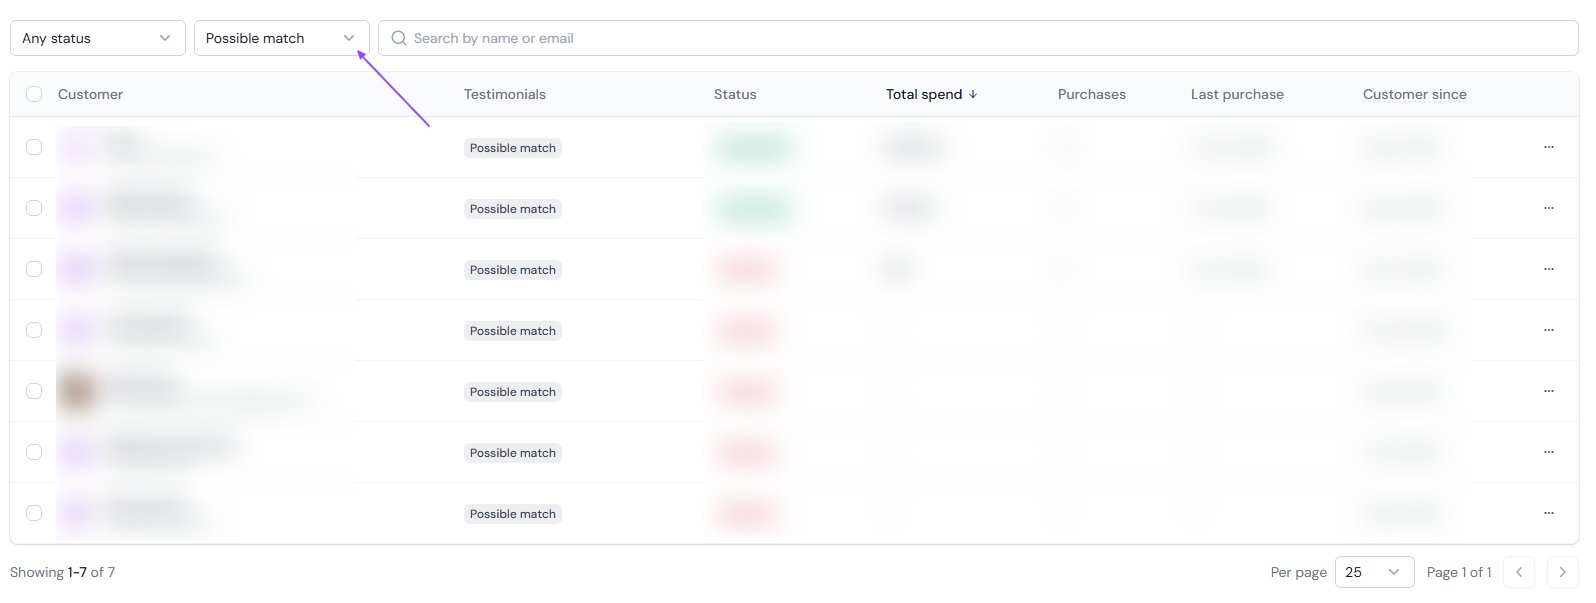
Click the Possible match label on the customer's row
Verify that the suggested testimonial actually belongs to the customer you choose
Click on the testimonial (or find a different one using the search bar)
Click Attach on the popup confirmation alert
From the main Customers page
Click the 3-dots on the right-end of the customer's row
Click Attach a testimonial

Find the relevant testimonial using the search bar
Invite or thank customers
Ask a customer who hasn’t left a testimonial yet, or thank someone who has, without leaving the list.
On a customer’s row, click the 3-dots and choose Invite for a testimonial to send a form invite or Send a thank you to send a thank you

To do several at once, select the customers with the checkboxes, then click Invite or Thank
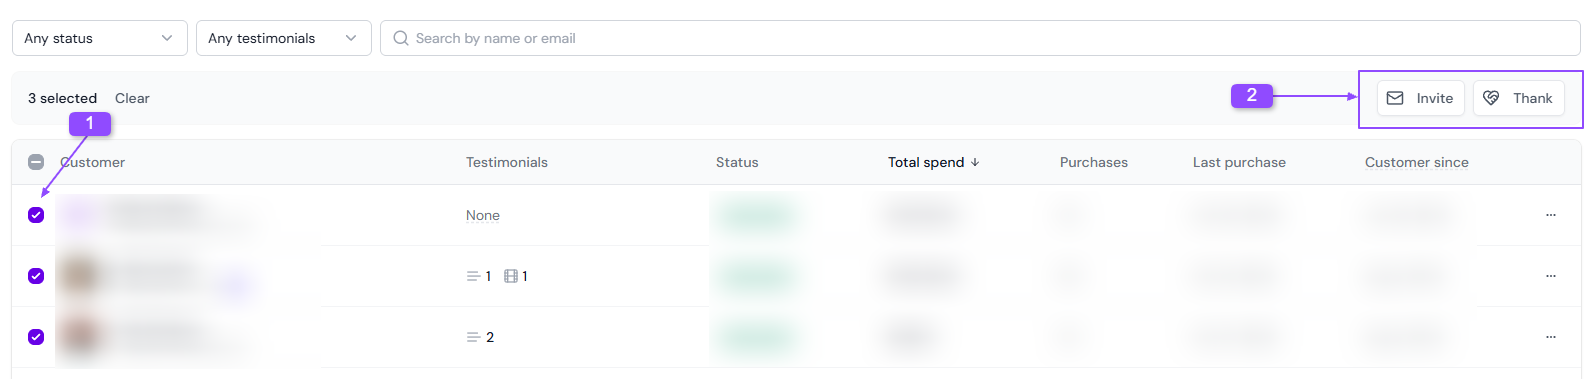
Invites use your form’s email and follow-up reminders, as set up in How do I use form invites? Thank yous work the same way as on the Thank Yous page.
If you disconnect Stripe
Your customers stay on the Customers page after you disconnect Stripe. New list of customers (from new purchase or new payments) stop coming in until you connect Stripe again.