
How to manage team members in your Senja project
Invite teammates to your Senja project, choose what they can do, and remove them when needed. Everything happens on your Team settings page.
Team member access is available on all Senja plans. Free accounts include 1 seat, Starter includes 2 seats, and Pro includes 5 seats (with additional seats at $5/month each).
Roles and permissions
Role | Can | Can't |
|---|---|---|
Admin | Invite and remove team members, cancel invites, update the project's billing | Delete the project |
Editor | Create and edit content in the project | Add or remove team members |
Sharer | View and share approved testimonials, forms, Widgets, Walls of Love, images and social videos | Edit or delete anything |
Any team member can change the plan on, or delete, their own personal account. This doesn't affect the project they were invited to.
For example, if you're an Admin on a Pro project and you subscribe to Starter yourself, the project stays on Pro and only your personal account moves to Starter.
Add a team member
Go to Settings > Team
In Invite Teammates, enter your teammate's email address
Choose their role: Admin, Editor or Sharer
Click Send invite
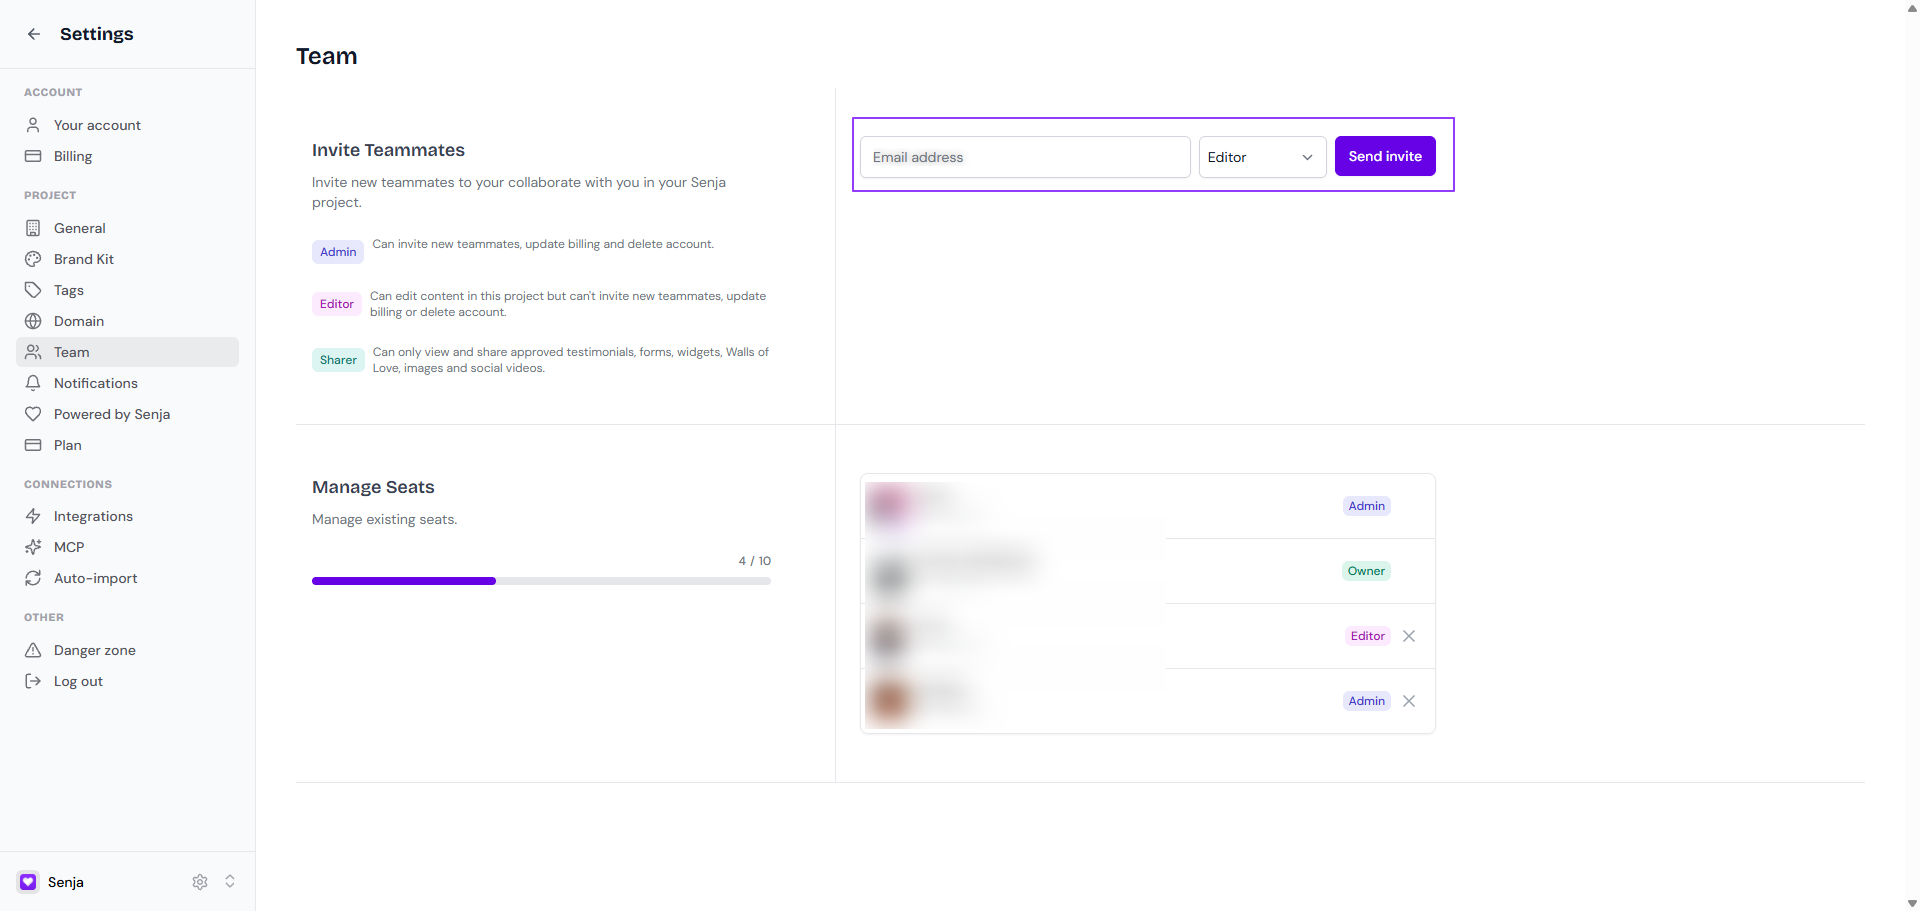
Your teammate gets an email invitation. Until they accept, it shows under Pending invites.
If you've used all your seats, you'll be asked to buy more at $5/month each (only available on Pro plan).
Remove a team member or cancel an invite
Only the project Owner and Admins can do this.
Go to Settings > Team
Find the person under Manage Seats, or the invite under Pending invites
Click the ✖️ next to them
Confirm when prompted
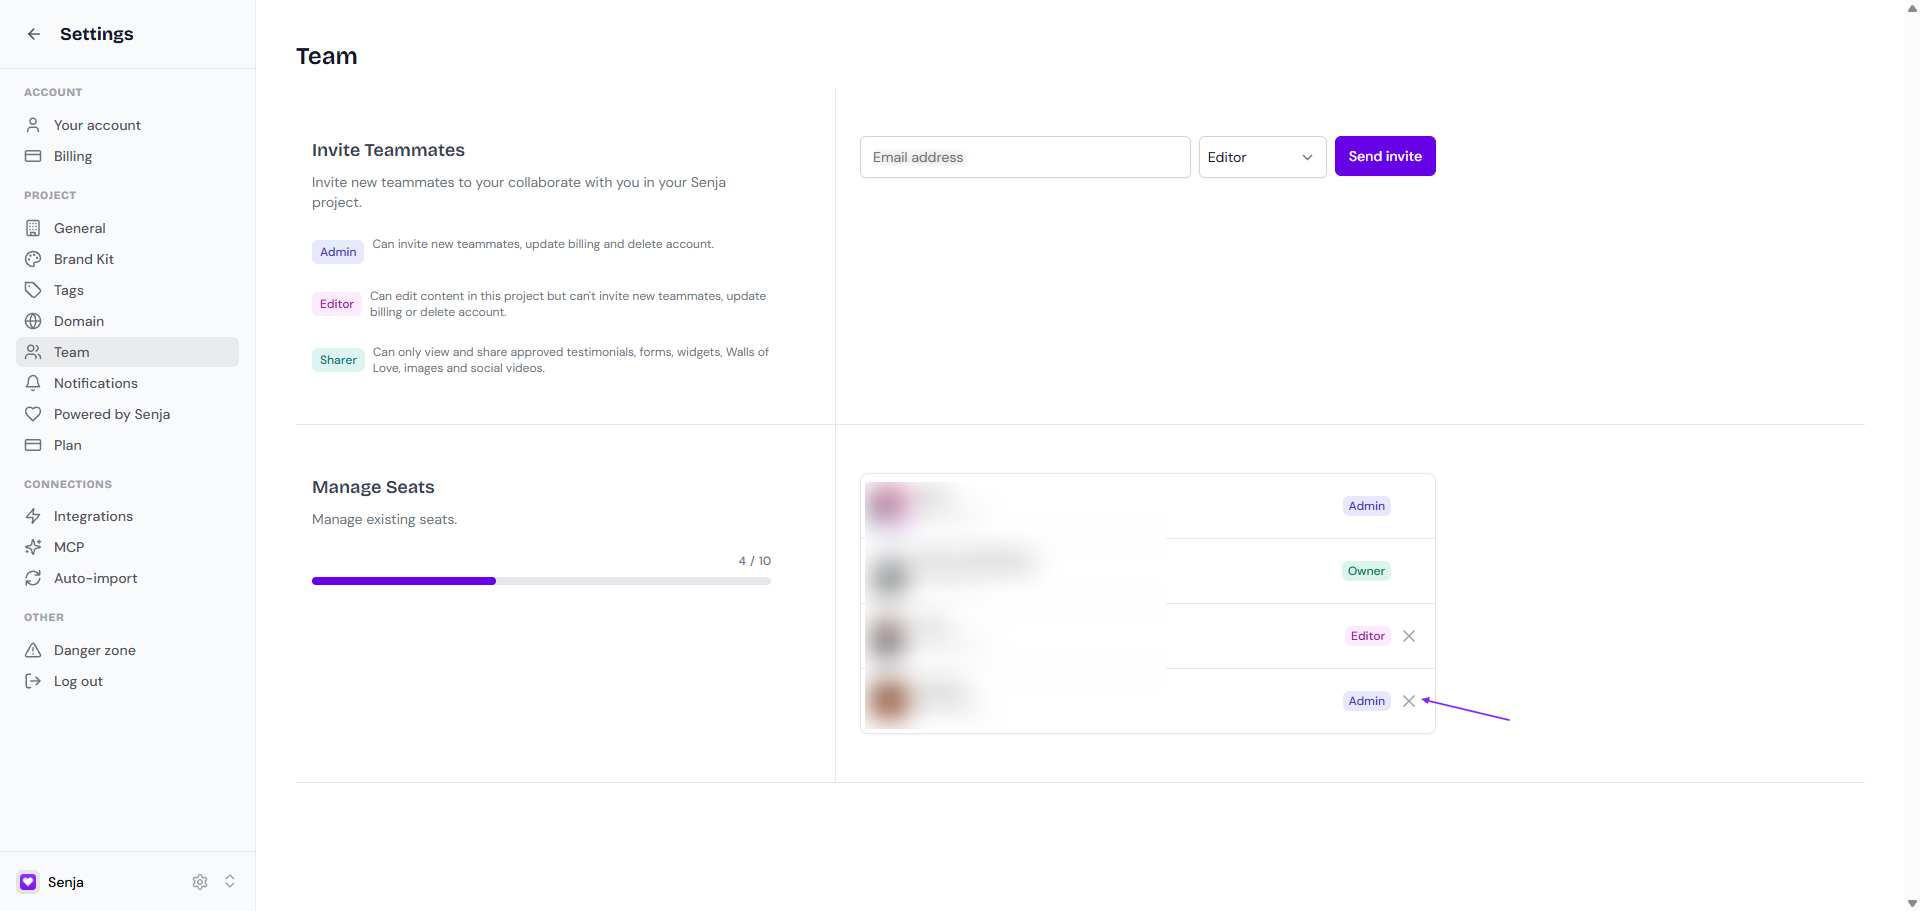
Once an invite is cancelled, its link stops working. You can't remove yourself or the project owner.
Don't see an invite under Pending invites? It may have failed to send, so there's nothing to cancel.
Change a team member's role
You can't edit a role directly. Instead:
Remove the team member (see above)
Invite them again with the new role
Ask them to accept the new invitation in their email