
How to create sizzle reels
Senja's sizzle reels creator uses our AI Director to automatically transform your video testimonials into compelling, ready-to-share sizzle reels.
This feature is available on all Senja plan (Free, Starter, and Pro) with 5 sizzle reels credit per month.
Start creating
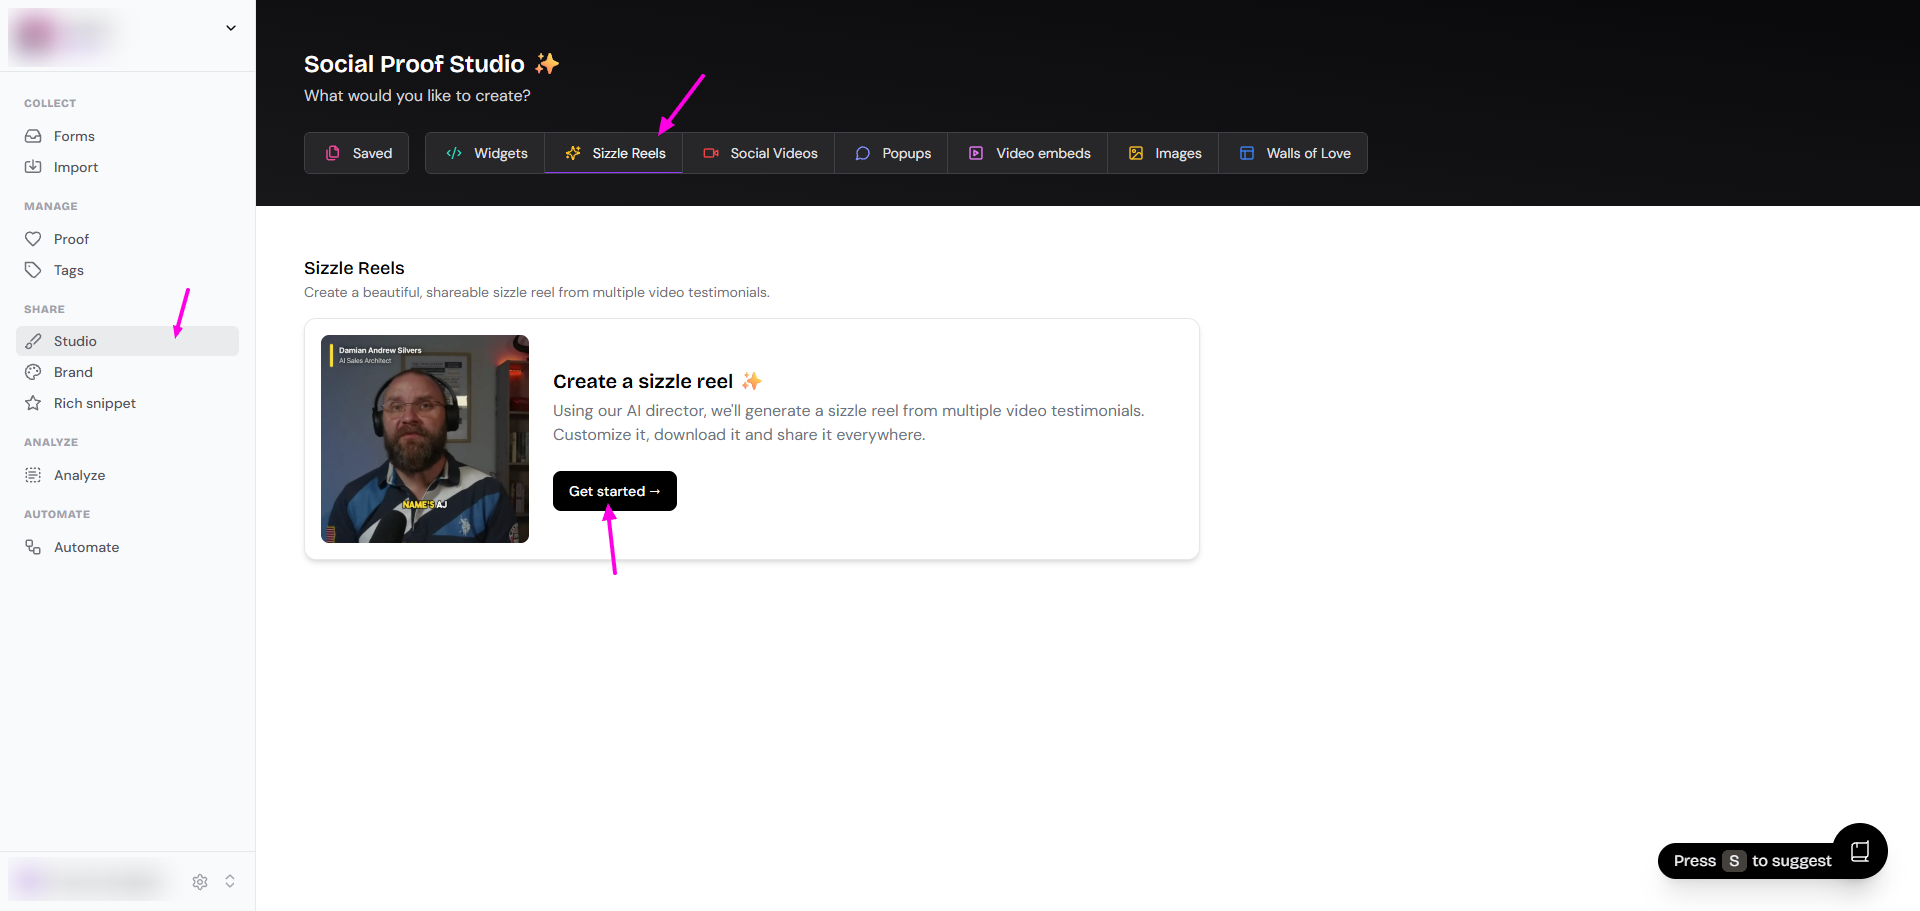
Go to your Studio page: https://app.senja.io/studio
Click Sizzle Reels tab
Click Get started
For a detailed guide on creating sizzle reeels, watch this video tutorial.
Workflow overview
You will go through 4-steps process:
Duration: Choose the length of your video
Testimonials: Select the videos you want to include
Direction: Tell our AI Director the story you want to tell
Review: Customize and download your finished sizzle reel
Step 1: Choose the duration
First, decide how long you want your final sizzle reel to be. This helps the AI Director pace the video and select the best clips to fit the timeframe.
On the Create a sizzle reel ✨ screen, you'll see several duration options.
Click on your desired length (e.g., 30 seconds, 45 seconds, 1 minute).
Click the Continue button to proceed
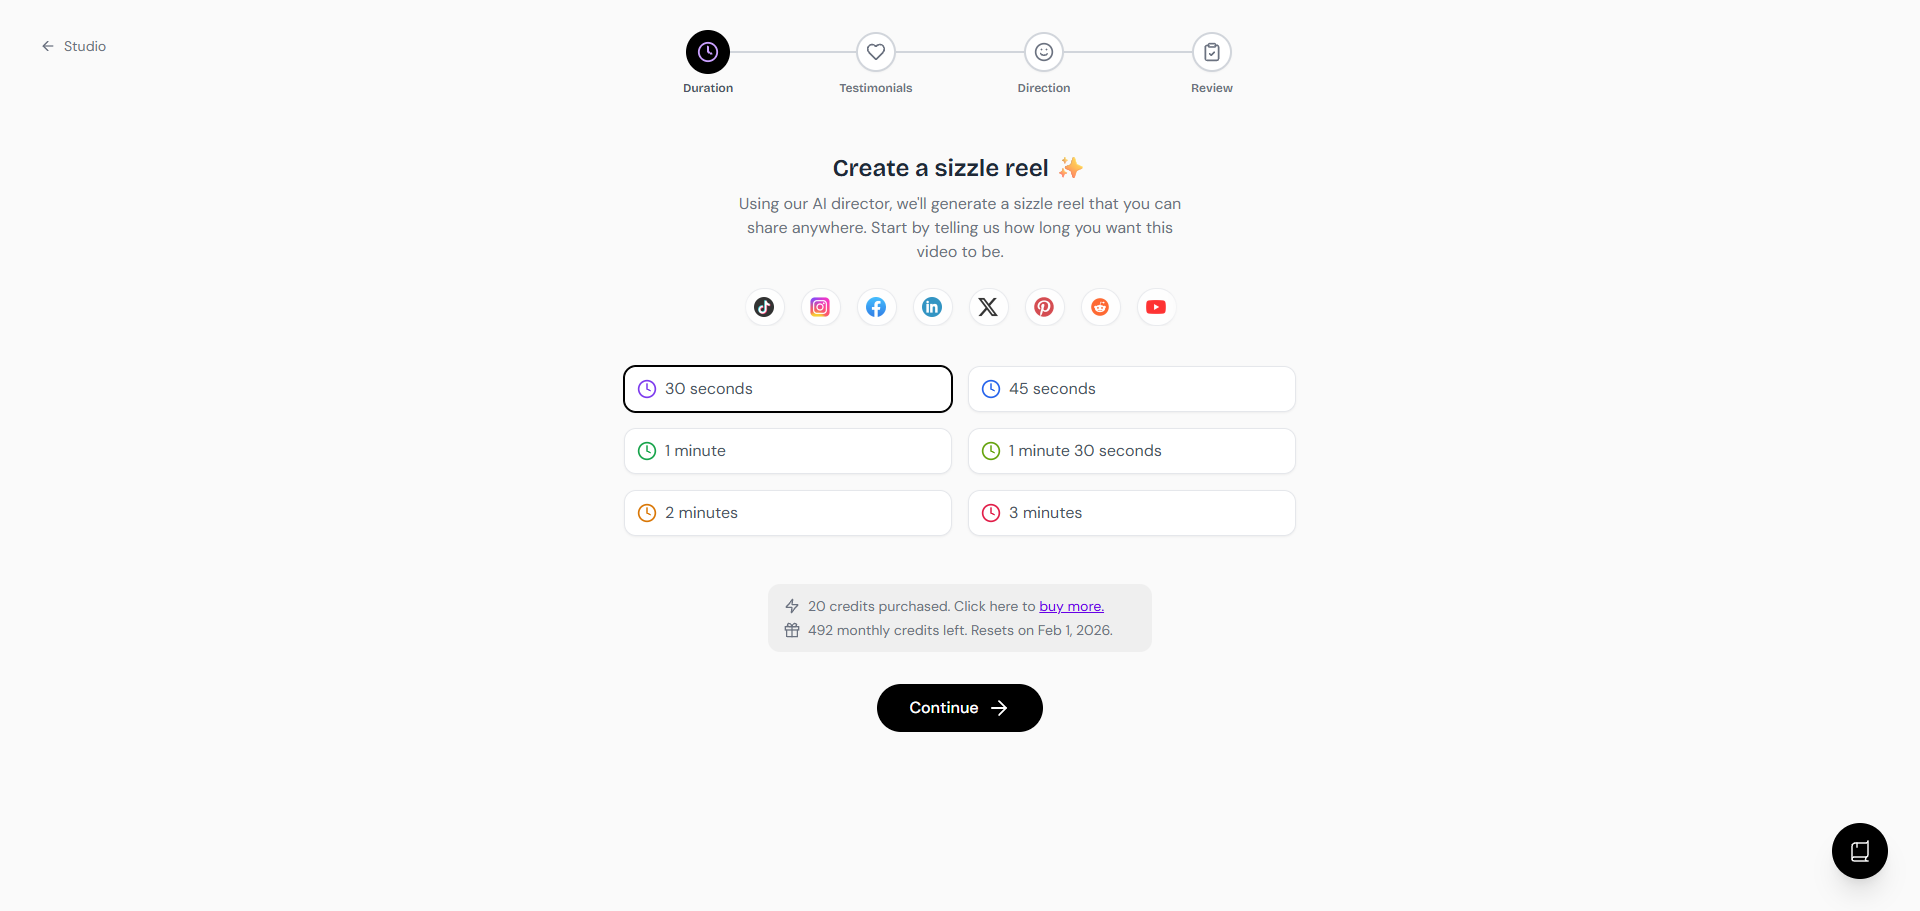
On this section, you can also see the remaining credit of your sizzle reels. You'll have 5 new credits every month.
Step 2: Select your testimonials
Choose the source material for your video (you can choose up to 5 videos)
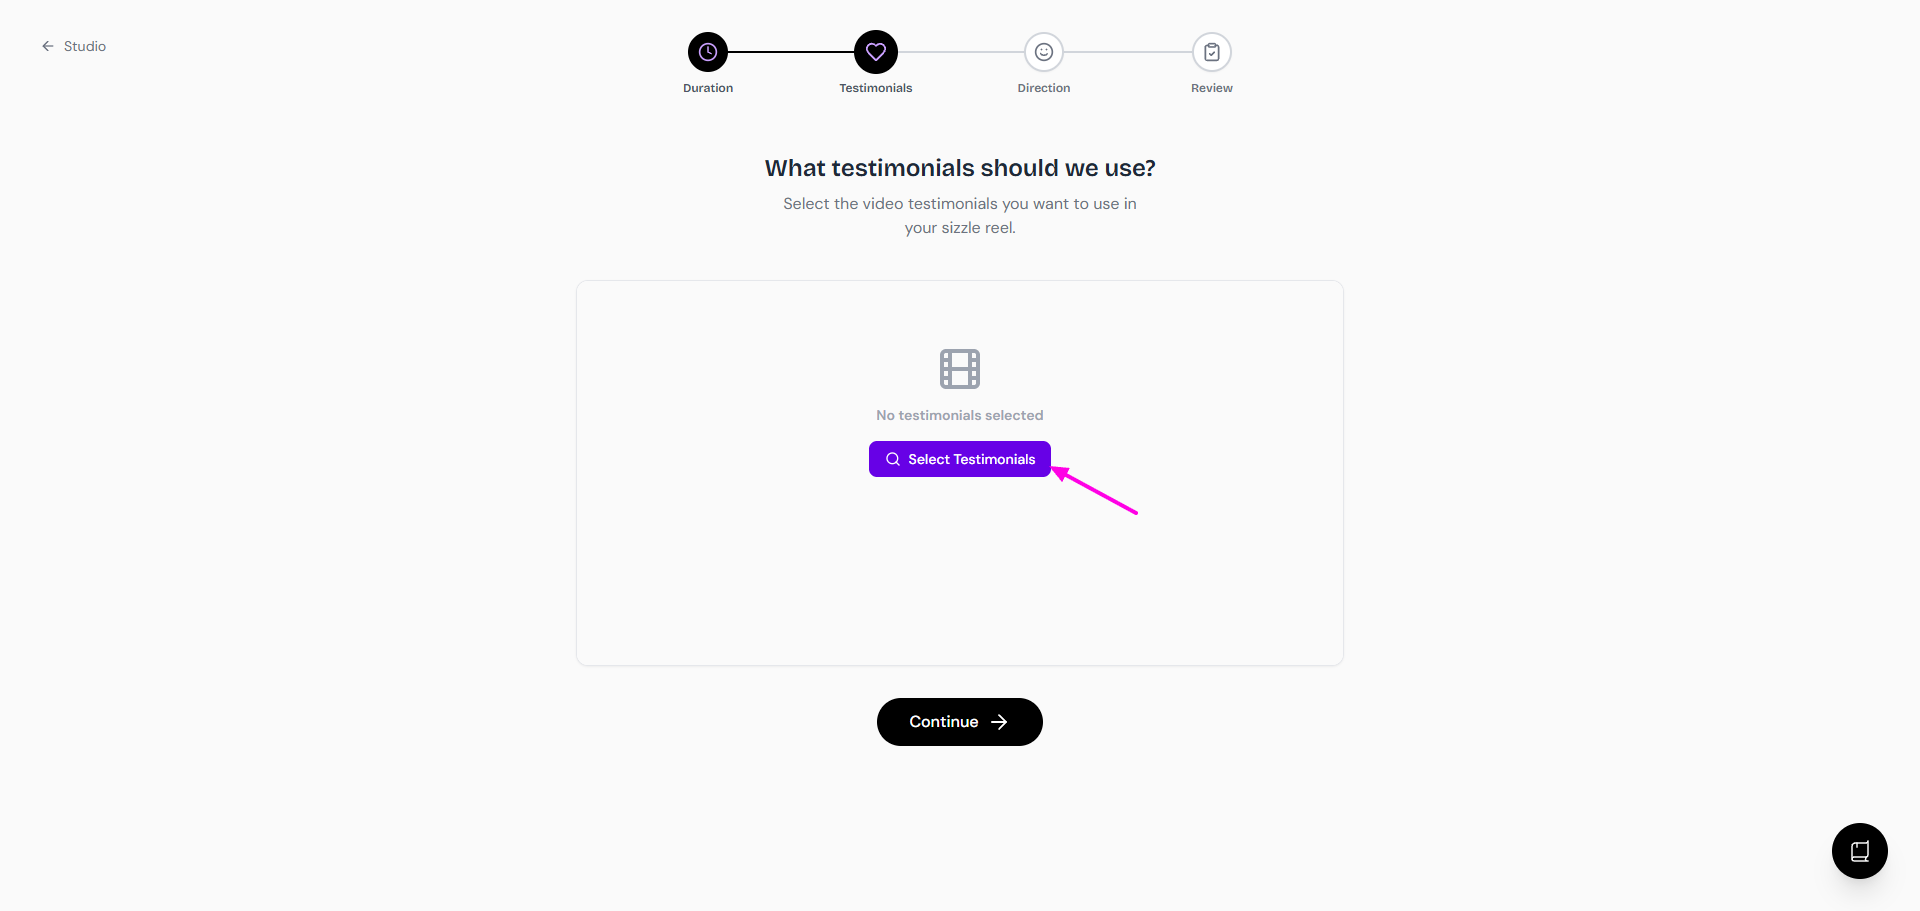
Click Change Selection if you want to use different testimonials

Important: Sizzle reels only works with video testimonials—it does not animate still images with audio. If you select testimonials that contain only text or still images with audio, they will not appear in your sizzle reels.
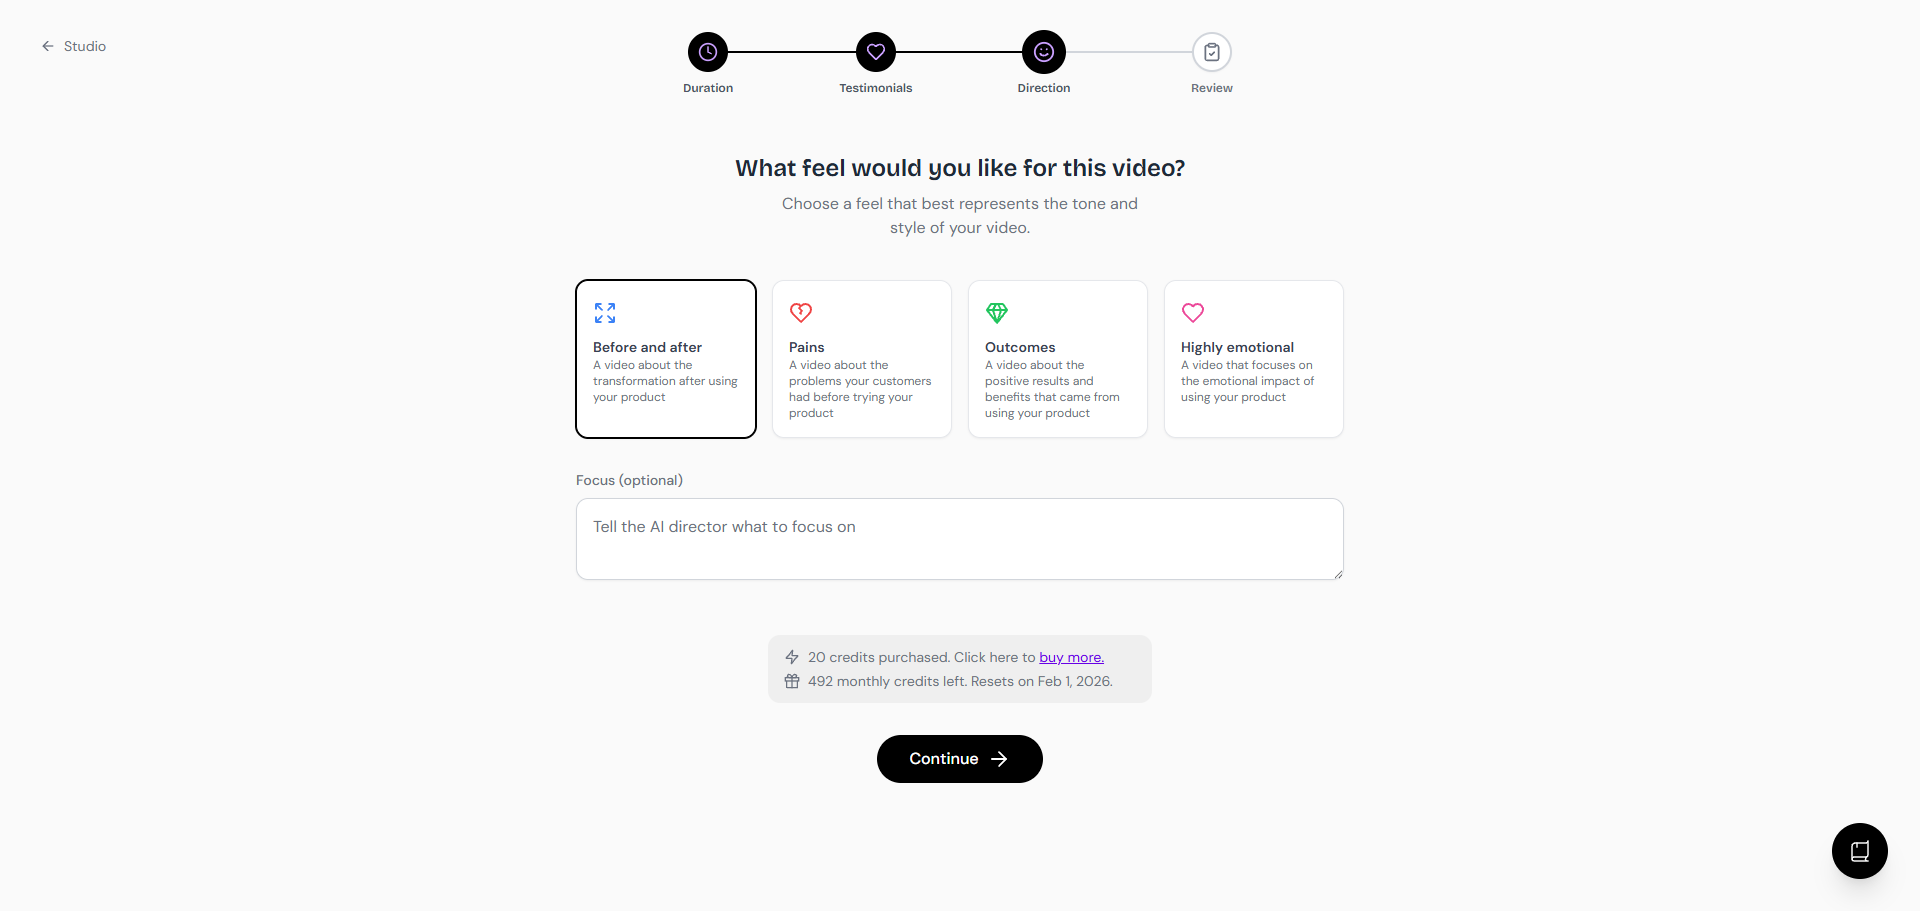
Step 3: Direct the AI
This is where you give our AI Director creative instructions. You can choose a pre-defined "feel" for the video and even provide a custom focus.
Choose a Feel
Select a theme that best represents the tone and style you're aiming for.
Before and after: Creates a narrative focused on the transformation your customers experienced.
Pains: Highlights the problems and challenges customers faced before using your product.
Outcomes: Focuses on the positive results, benefits, and successes customers achieved after using your product.
Highly emotional: Creates a video that pulls at the heartstrings by focusing on the emotional impact of your product.
Focus (Optional)
For even more customization, you can give the AI Director a specific text prompt. Use the Tell the AI director what to focus on text box to guide the narrative.
Example prompt: "Create an energetic video focusing on how our product saves users time and makes their workflow easier."
Once you've made your selections, click Continue.
Step 4: Review, customize, and download
Now, sit back and relax. If this is your first time generating a video, you will see the Sizzle Reels Generator start up. Our AI is hard at work:
Our AI is working on uploading testimonials, fetching transcripts, reading timestamps, feeding to our most powerful model, generating script, filming clips, and stitching everything together
You can edit/customize the sizzle reels (see more details below)
Download the video when you're done
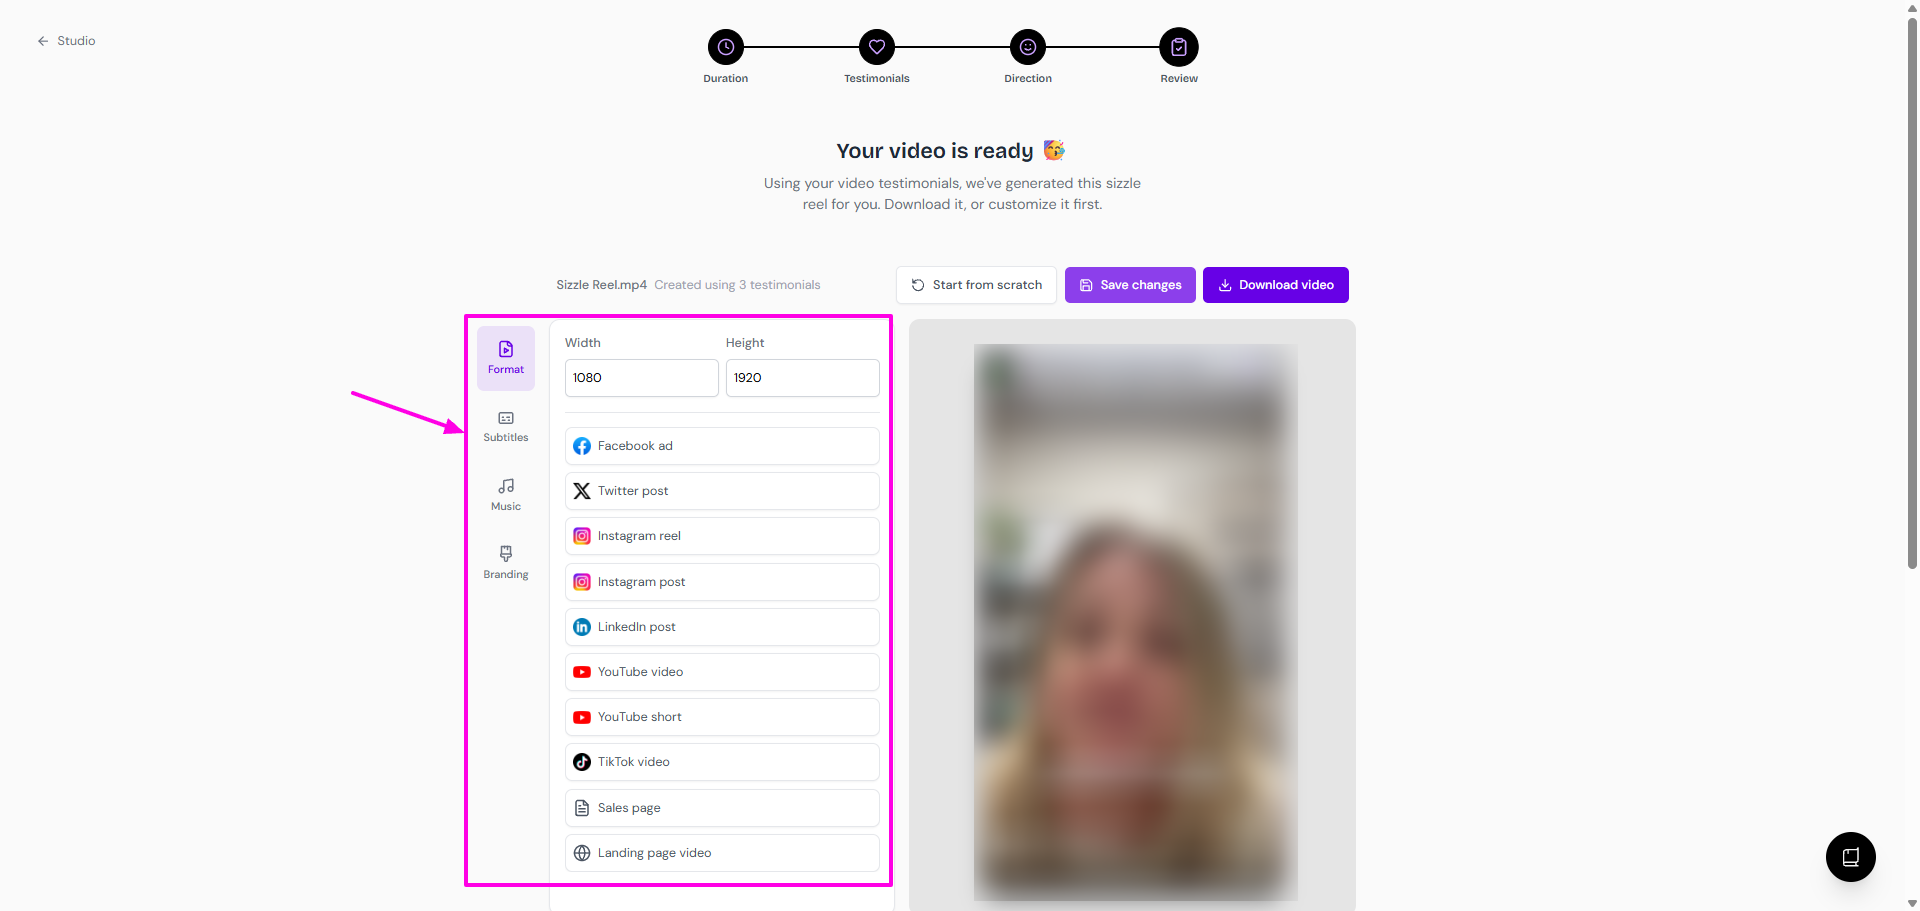
Format
Quickly resize your video for any platform.
Select from presets like Instagram reel, TikTok video, YouTube short, or Facebook ad
Alternatively, you can enter a custom Width and Height
Subtitles
Make your video accessible and engaging with customizable subtitles.
Enable/disable the subtitles
Choose a Subtitle Font
Set a Highlight Color for keywords
Adjust the Font Size and Vertical Position (Top, Middle, Bottom)
Music
Add a backing track to enhance the mood of your video.
Enable/disable music
Browse and select a track from our royalty-free library.
Branding
Ensure the video matches your brand identity perfectly.
Set your Primary Color
Toggle the visibility of the Customer Tagline, Customer Company, and the Show Senja branding options
Once you are satisfied with all your customizations, click the purple Download video button to save the file to your computer. You're now ready to share it with the world!
Your sizzle reel is ready! On the final screen, you can preview your video and use the powerful editor on the left to fine-tune every detail before you download.
Already have a sizzle reel?
The sizzle reels that you've created will go to your Saved tab in the Studio: https://app.senja.io/studio
Click on the saved sizzle reels to edit/download it
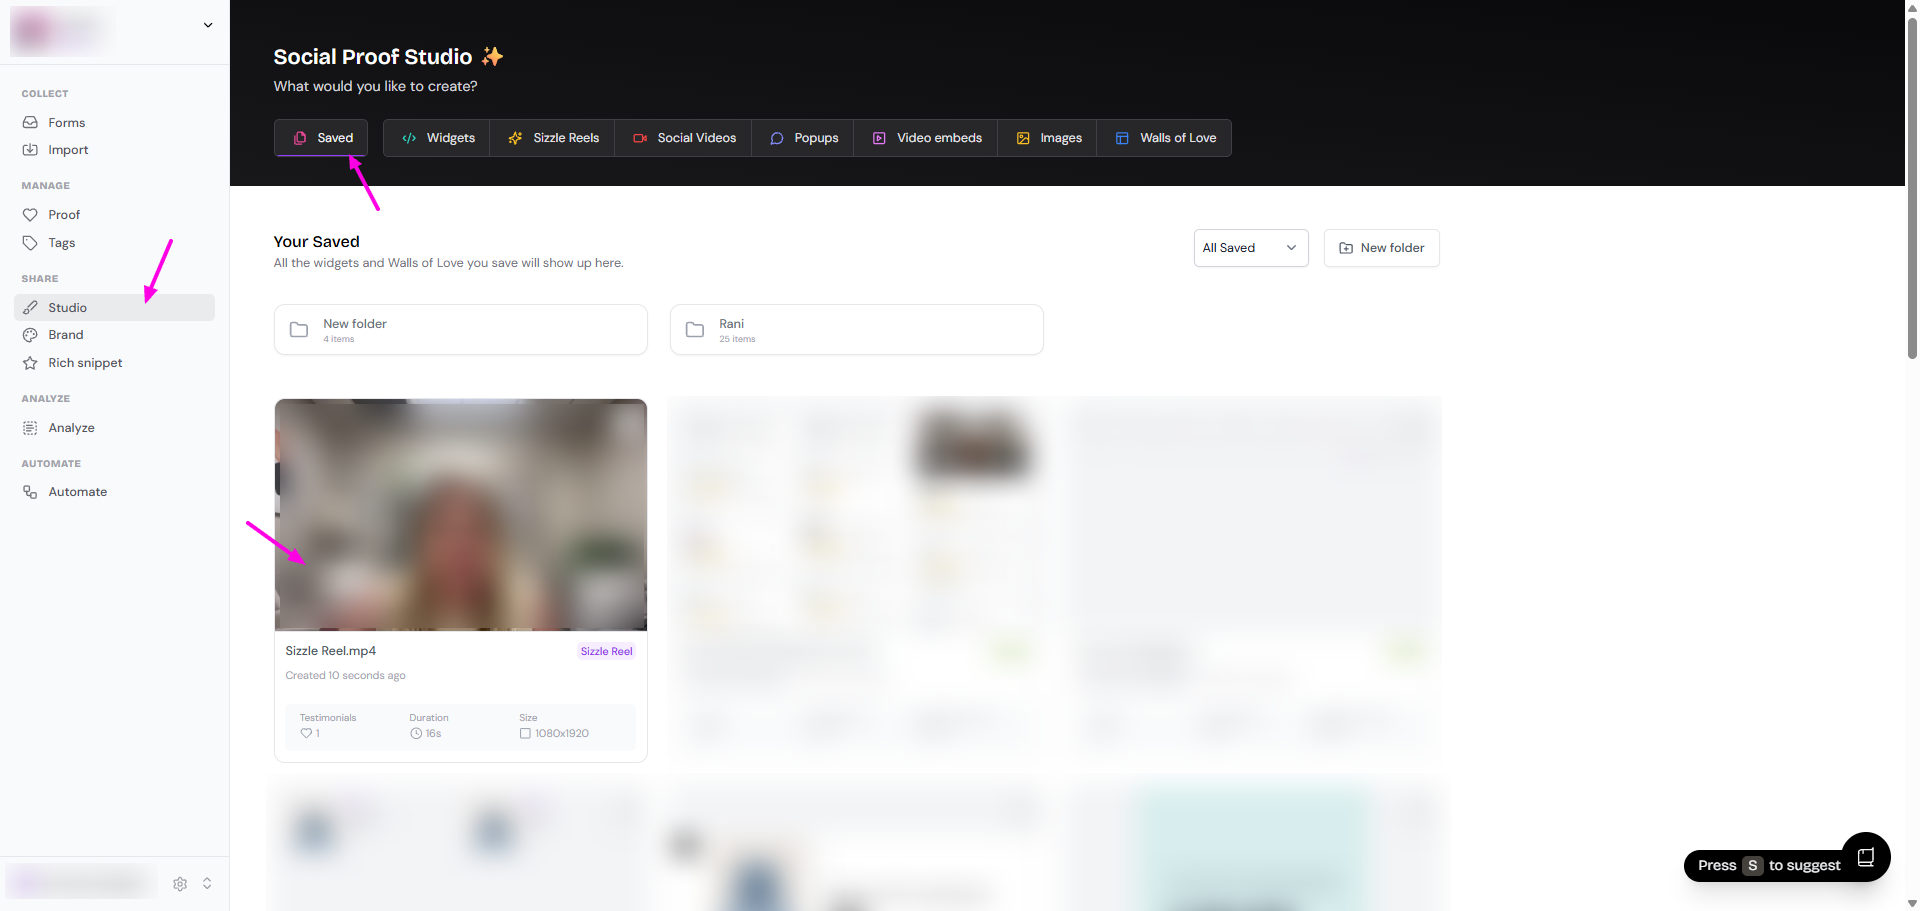
You'll be directed to the Review page
Make the changes as you wish, Save changes, and Download video