
Add Senja widget testimonials to your app
Let your users add their Senja testimonials directly in your product.
Our platform integration allows your users to load a modal pick one of their Senja testimonial widgets and embed it directly into a page in your app, for example, their profile page, or upload them to your app.
This functionality is ideal for landing page builders, profile pages, marketplaces, and link-in bio tools. Anywhere your users may want to quickly add their current and new testimonials without coding or fussing.
Watch our integration in action
This is the user experience of adding testimonials in your app:
Getting started
Our platform script allows you to either:
Get a Senja widget from a Senja customer
Get a video clip from a Senja customer
To get started, add the Senja platform script to the <head> of your website.
<script src="https://static.senja.io/dist/integration.js" type="text/javascript" async="true"></script>If you'd like to allow your users to embed their Senja widgets in their app, follow these steps:
Step 1: Add a Senja button to your app
<script>
	async function getWidget() {
		const id = await window.SenjaIntegrationPlatform.getWidgetId({
			// optional: if you don't want Senja to open a popup and would
			// prefer the widget picker to be embedded, use this argument.
			target: "#the-id-of-your-container"
		});
		if(!id) return;
		// save the widget id in your database/component
	}
</script>

<button onClick="getWidget()">
	Add your Senja widget
</button>
This will open the Senja modal and return the ID from Step 3.
Step 2 (Senja): We will allow the user to log in and pick their widget
The button will load a modal. The user will then connect their Senja account.
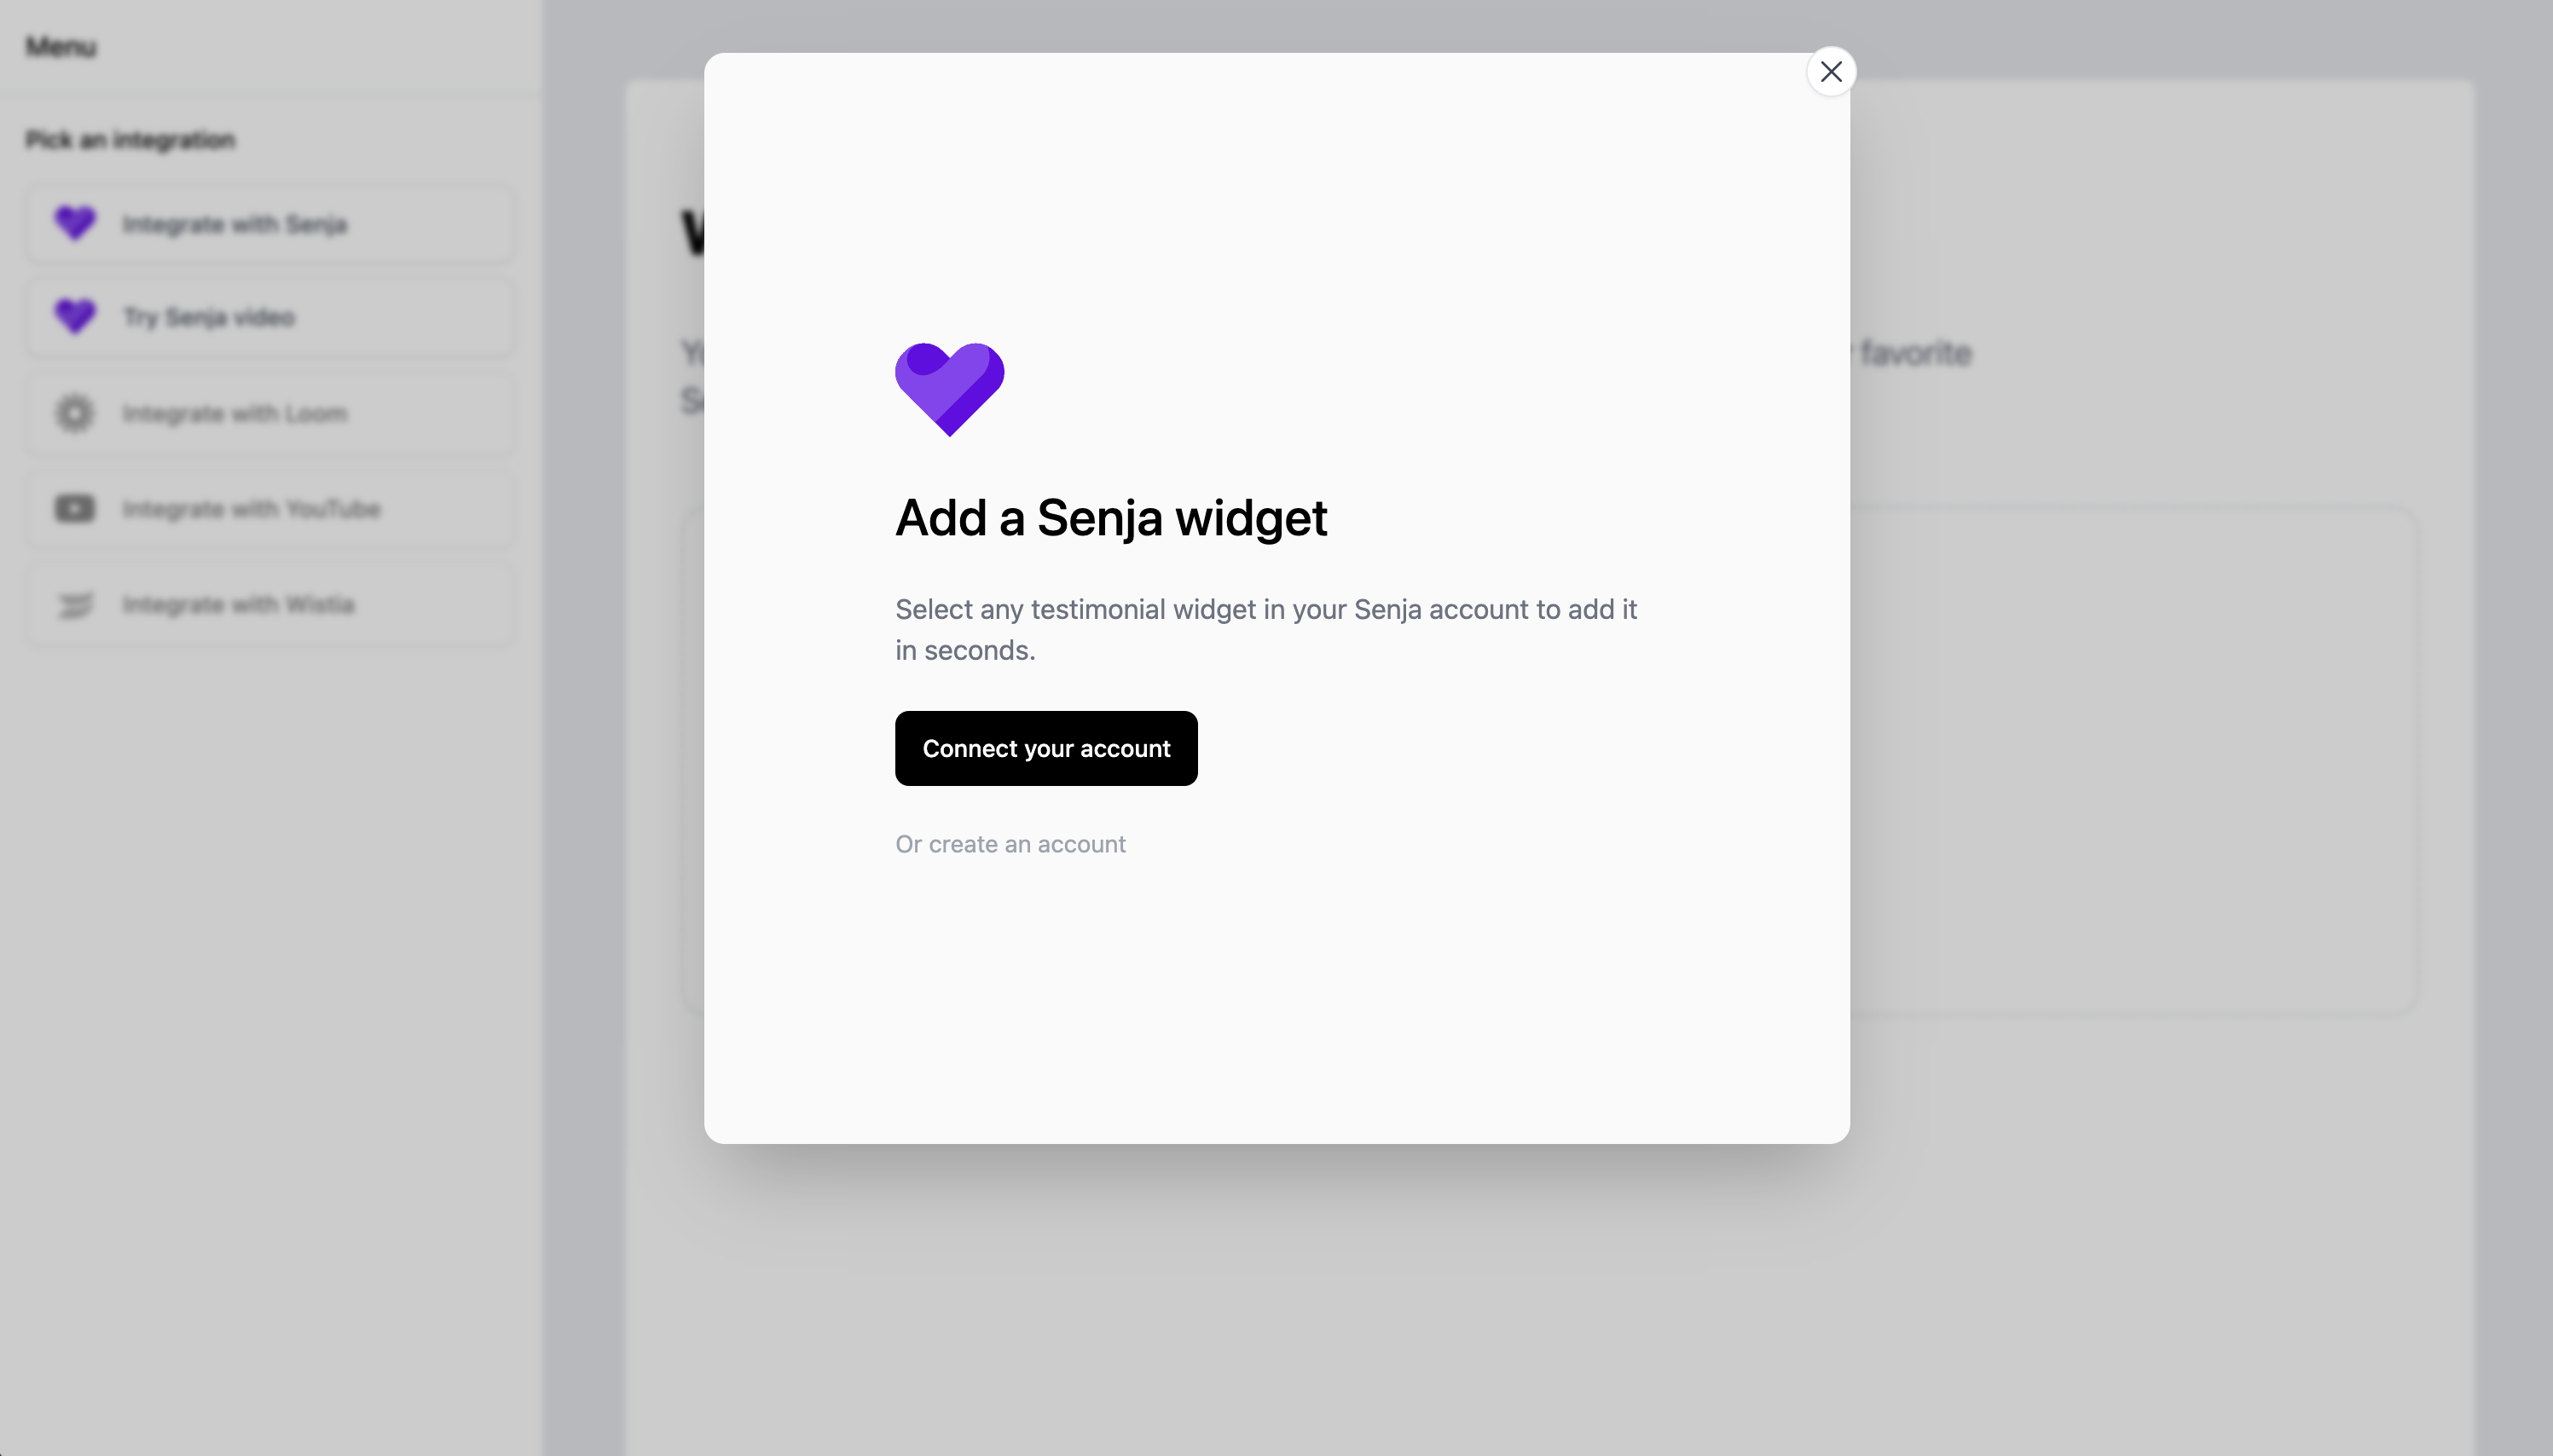
The user will pick a widget and click Select this widget.

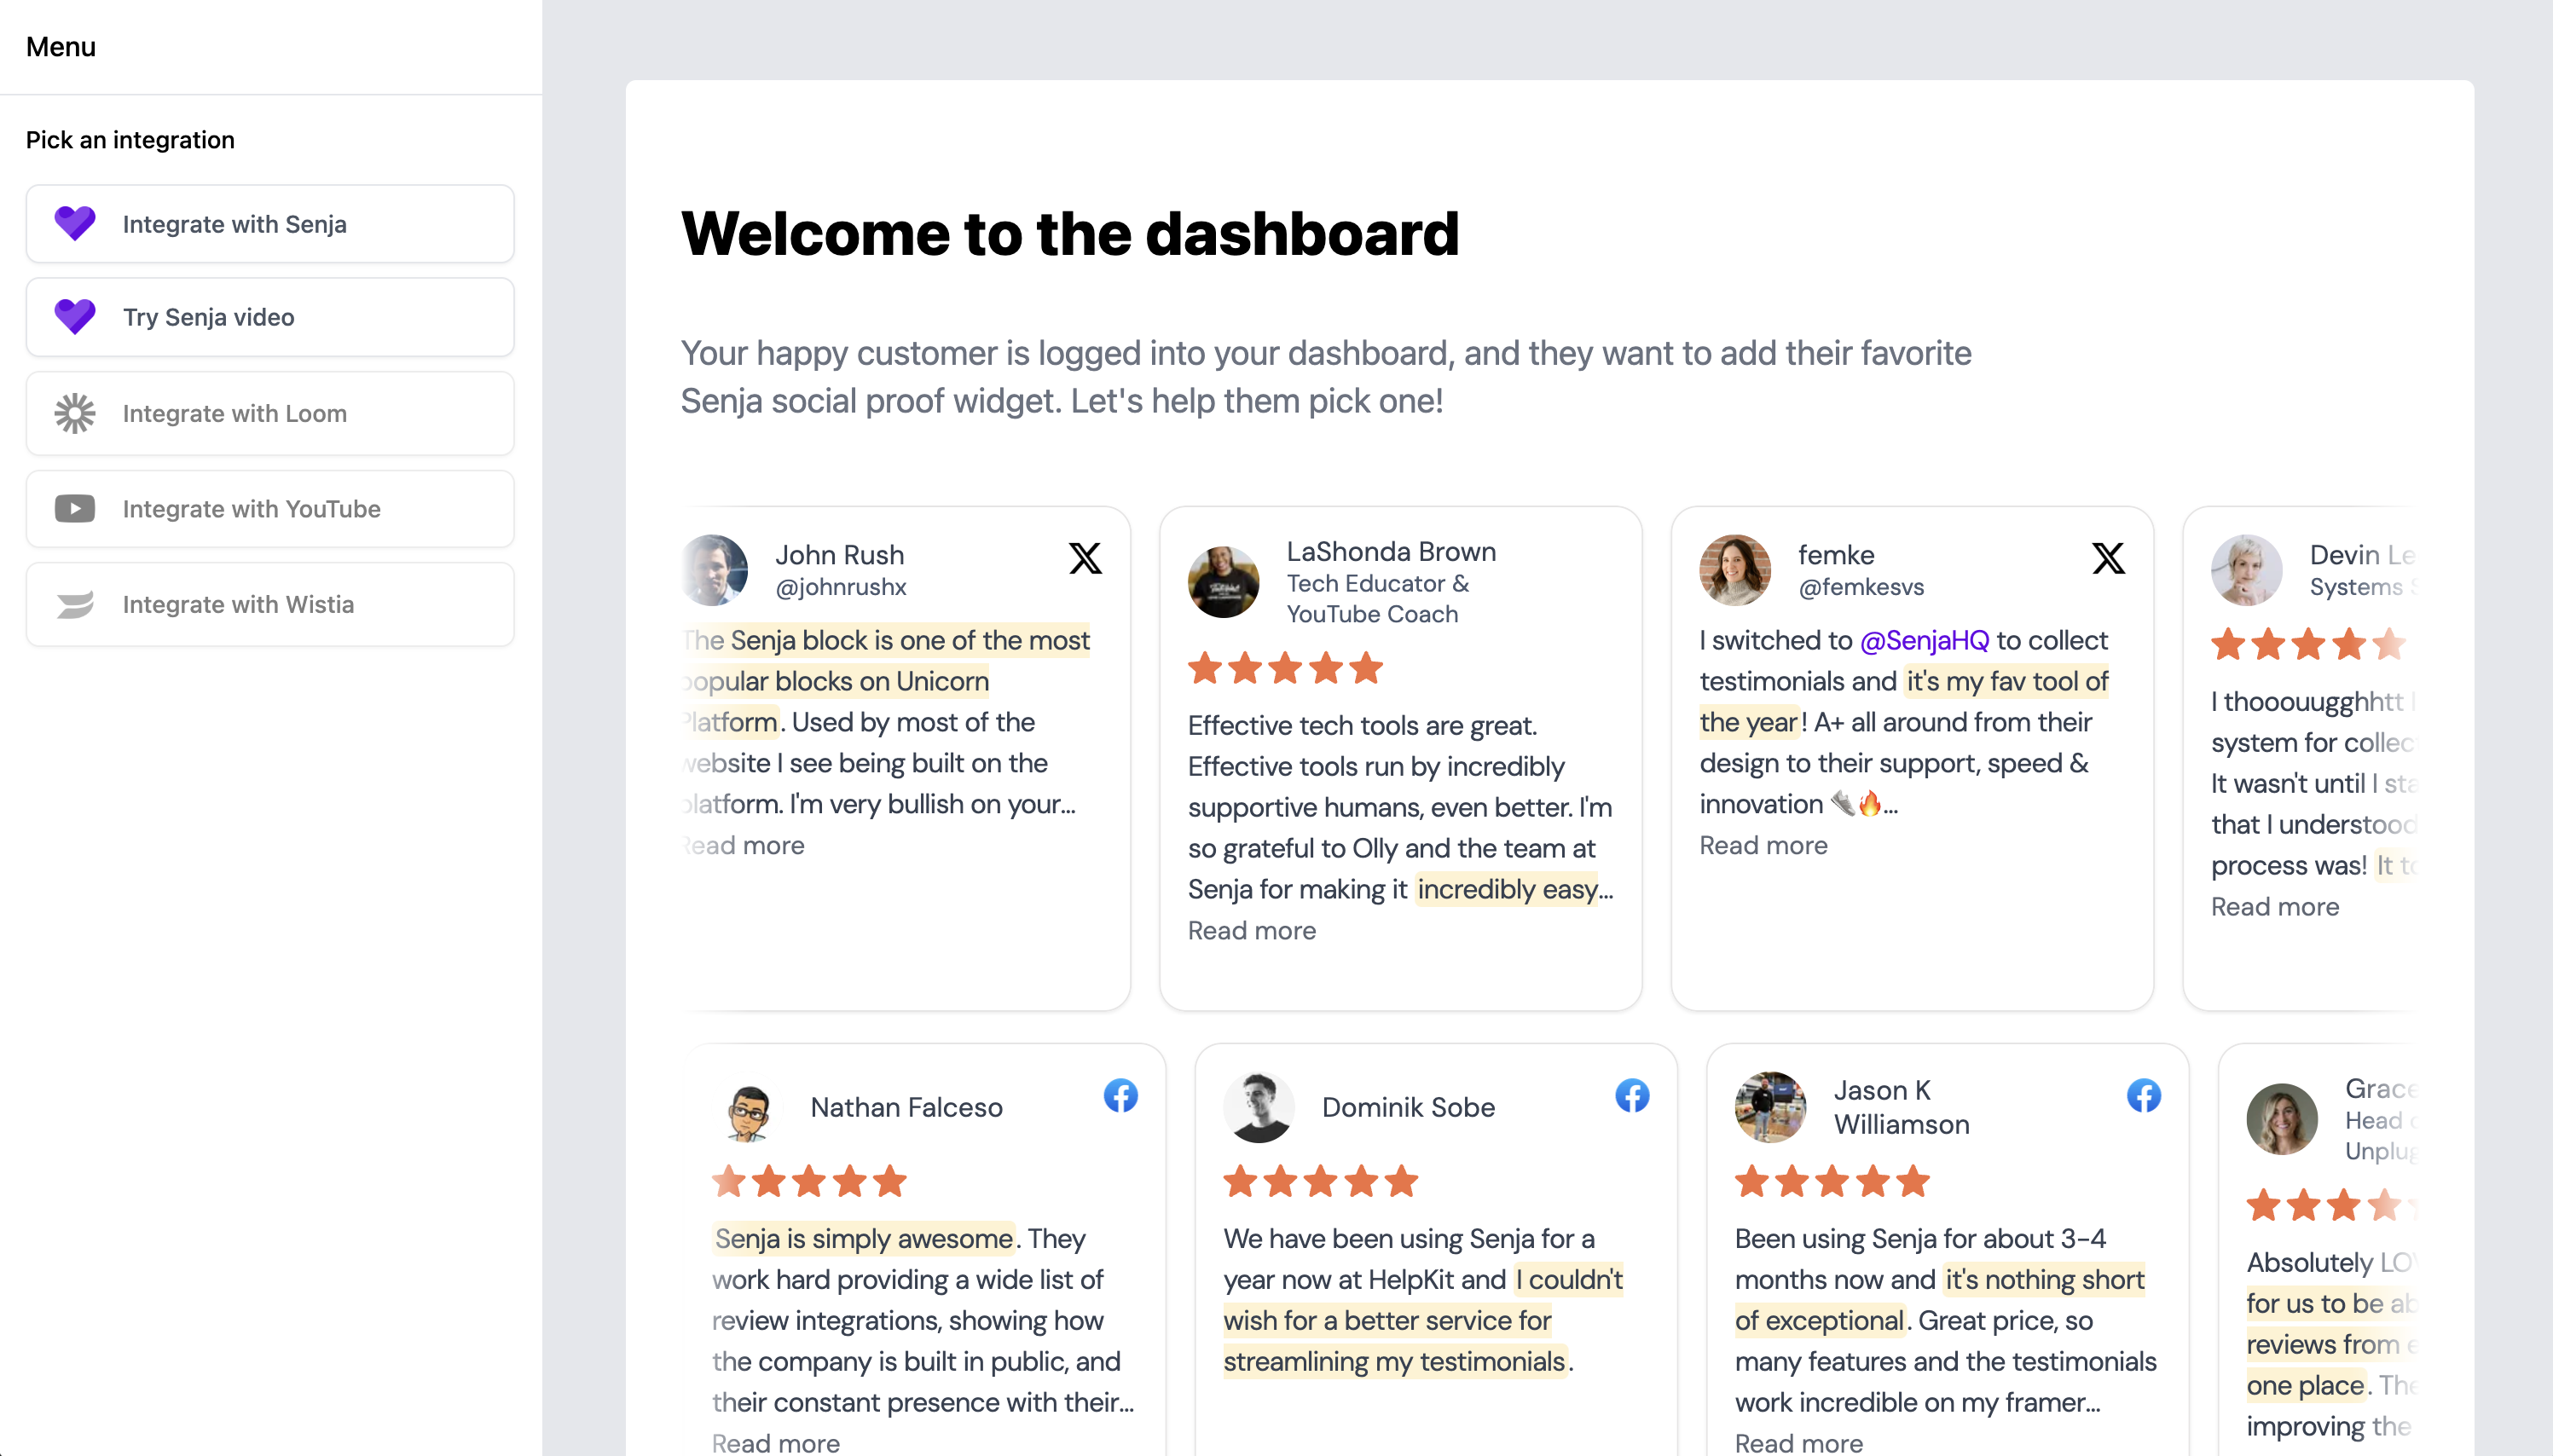
Step 3: Inject the widget code into your site
The Senja widget embed code looks like this:
<script async="true" src="https://static.senja.io/dist/platform.js" type="text/javascript"/>
<div data-id="{THE WIDGET ID HERE}" data-mode="shadow" data-lazyload="false" class="senja-embed"/>
You can add it where you want the widget to be displayed. You may need to rewrite this code for your Framework.
If you were using React/NextJS, you can embed it like this:
import { useEffect } from "react"

export default function SenjaEmbed(props) {
    let id = props.widgetId;
		let lazy = false;

		// Inject Senja script into the head of the dom
    useEffect(() => {
				// Check if the script is already in the head of the dom
        let script = document.querySelector(
            `script[src="https://static.senja.io/dist/platform.js"]`
        );

        if (script) return;

        script = document.createElement("script")
        script.src = "https://static.senja.io/dist/platform.js";
        script.async = true
        script.type = "text/javascript"
        document.body.append(script);
    }, []);

    return <div className="senja-embed" data-lazyload={lazy} data-id={id}></div>
}
Your widget should now be rendered on your page. Here’s how it will look on the page:
Other ways to integrate
Senja's platform script also allows you to add Senja video testimonials from customers to your app. Here's how: