
Auto-collect testimonials
You can automatically invite customers to leave you a testimonial at the perfect moment. Here's how
Auto-collect is available on Senja's paid plans.
With auto-collect you can send testimonial invites when a customer is added or tagged in your email tool or CRM, checks out with your payment platform, registers in your course platform, or is tagged in your support software.
Triggering the request at the right time ensures you’ll collect more testimonials than ever before. Once a customer submits a testimonial, we automatically stop any scheduled follow-up reminders for them.
How to setup the automation
To enable automatic testimonial invites, we use Zapier templates that help you set up triggers for all supported services. No manual work needed.
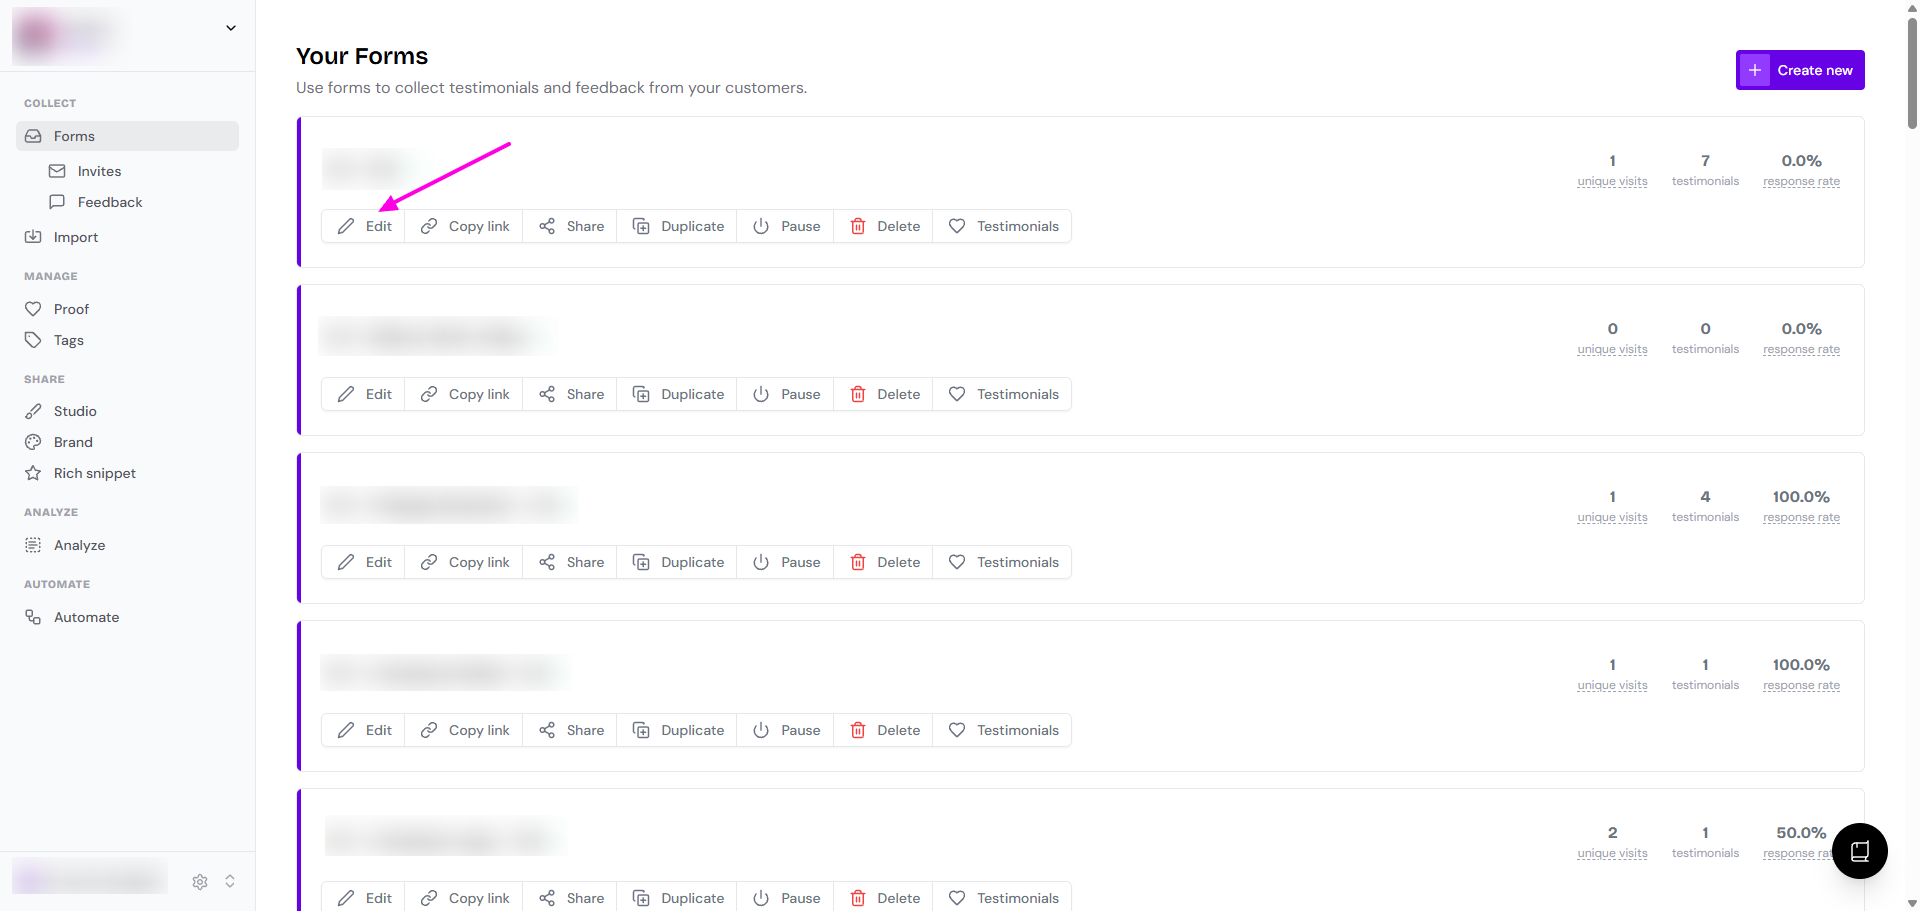
Go to Forms page: https://app.senja.io/forms
Edit the form you want to automate
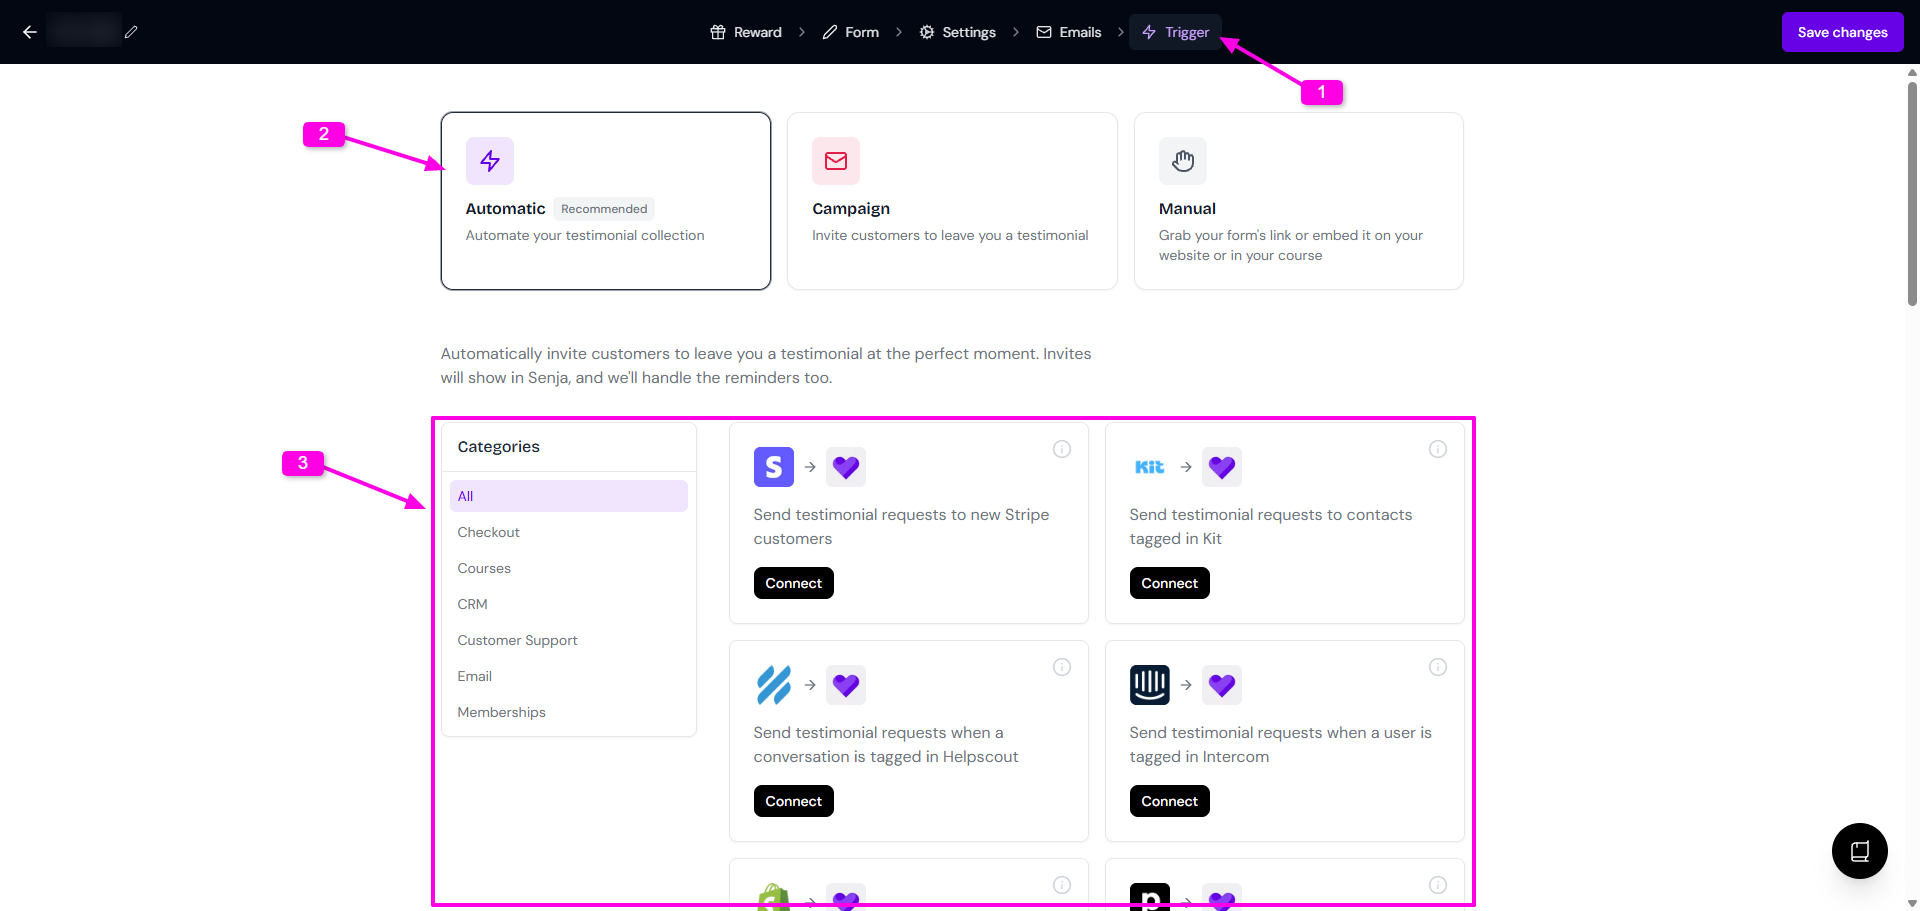
Go to Trigger > Automatic
Choose the platform to connect
Example
You want to send a testimonial invite after a customer completes a purchase on Stripe.
Click click the Connect button next to Stripe
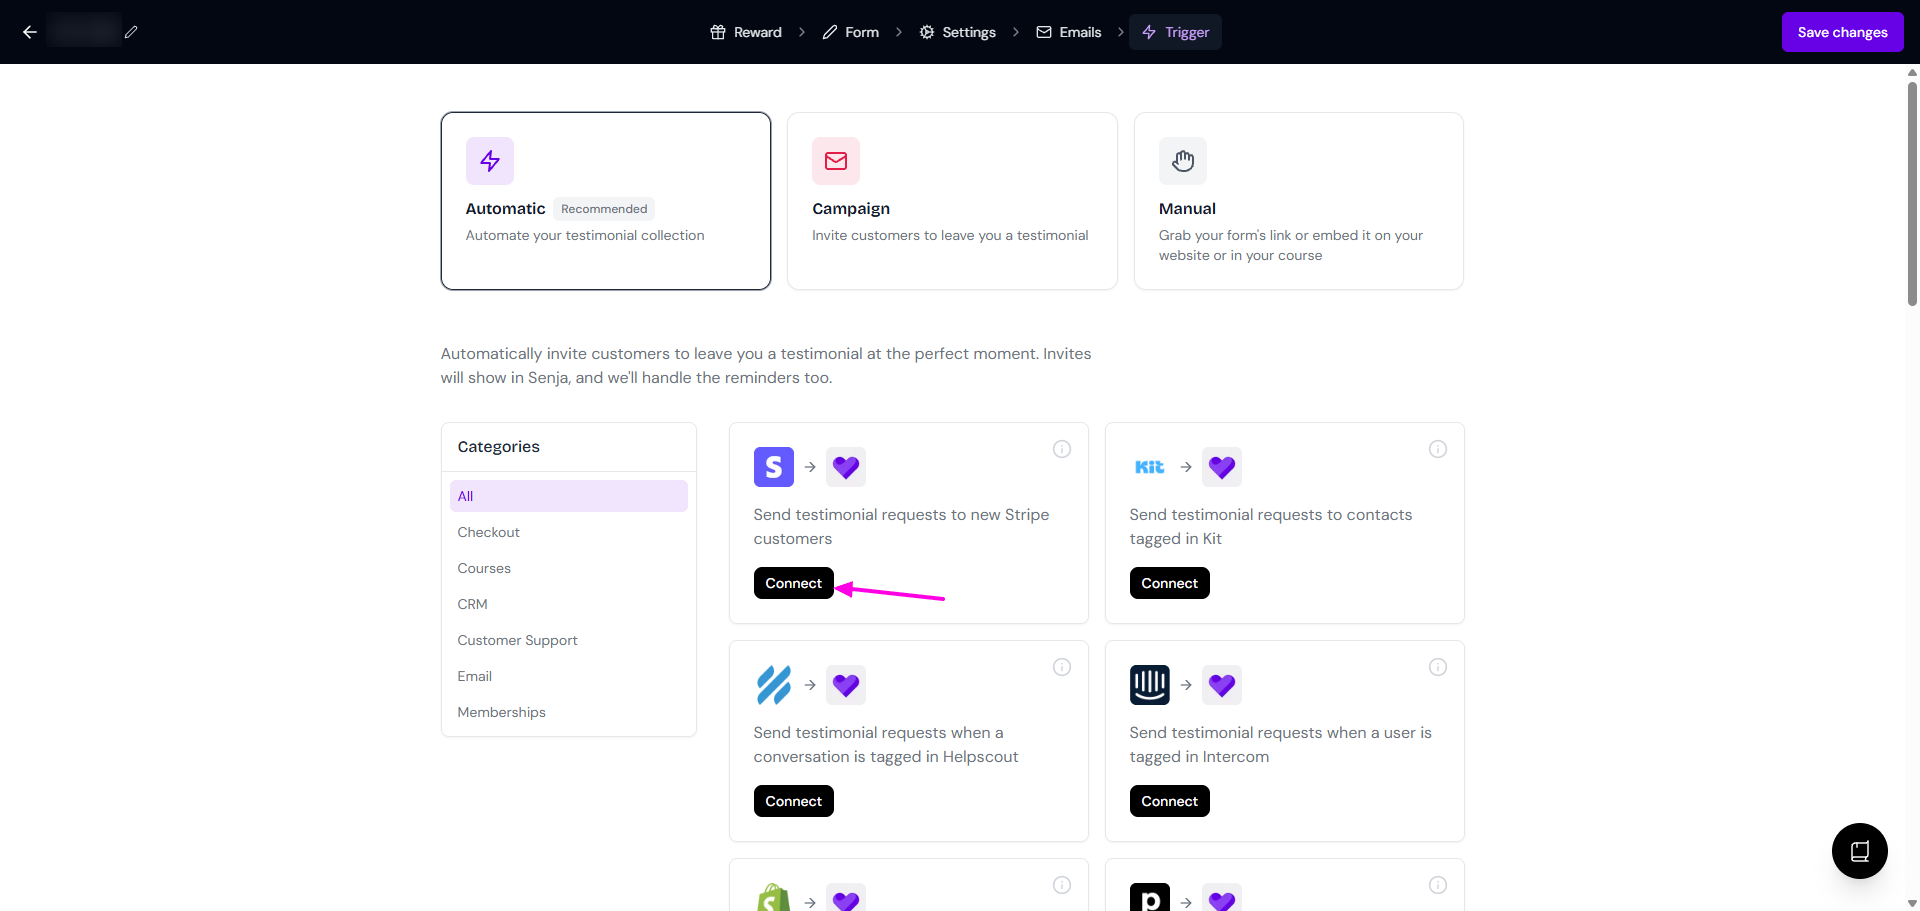
You’ll be redirected to the Zapier template
Click the Sign in button on the Stripe step panel on the right to connect your Stripe account or click Continue if you are already authenticated
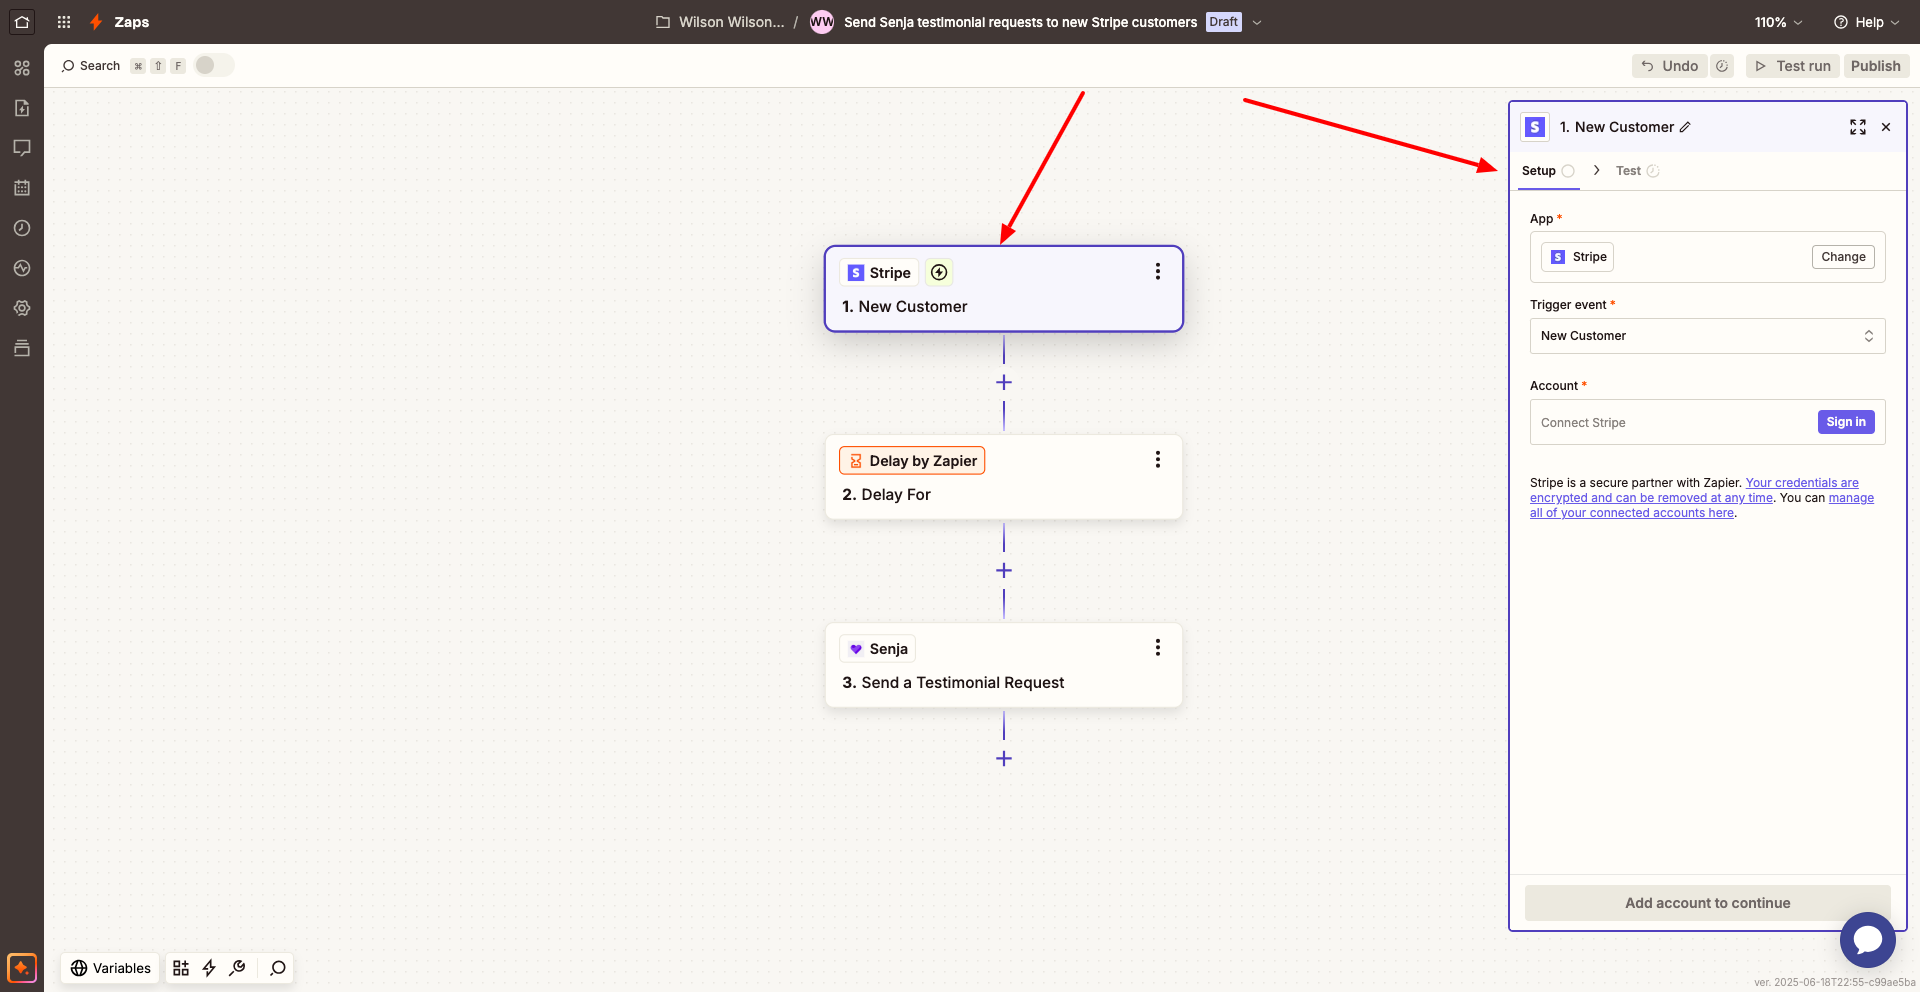
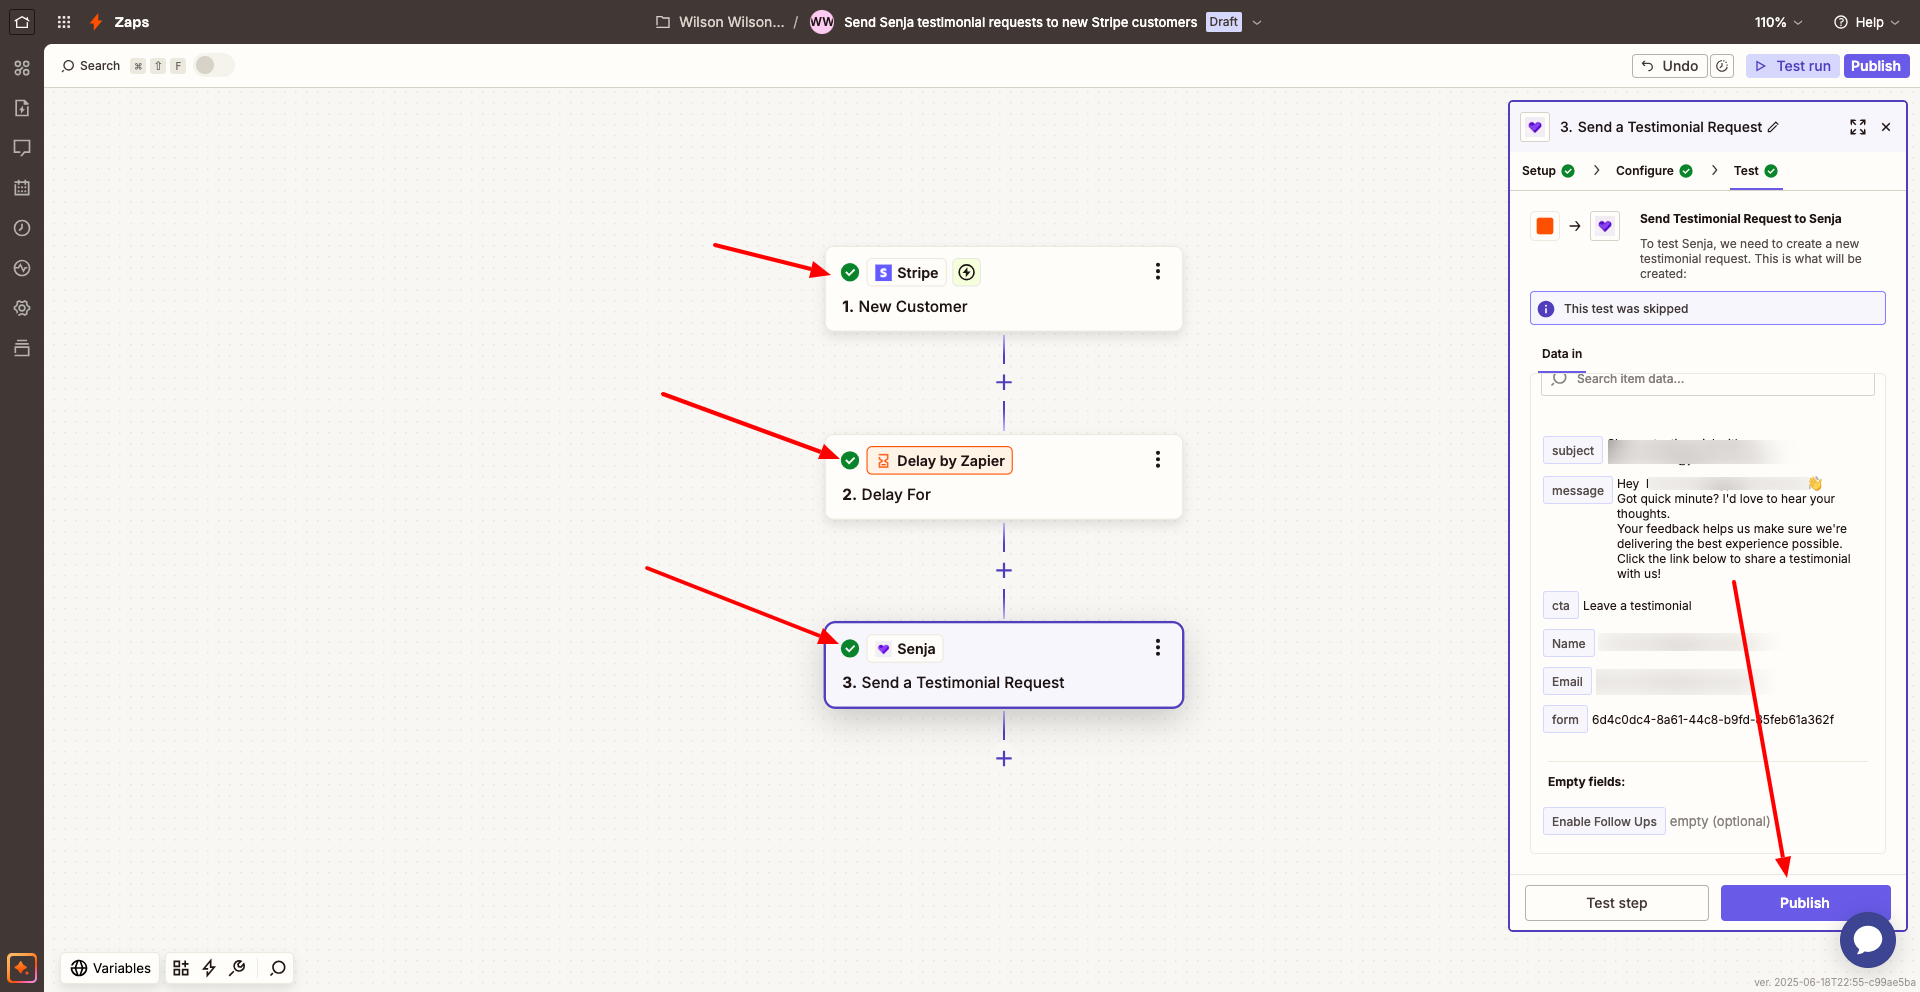
Set your Delayed for
This Zap is set to wait 36 hours after a new customer is created in Stripe before triggering a testimonial invite in Senja
You can adjust this delay to any duration that suits your workflow

Connect your Senja account to this Zap
If you've already done that, you’ll be able to select your account and customize the content of the testimonial invite to be sent

Once you've made sure you've connected and tested each step, click the Publish button
Once published, Senja will start sending out testimonial invites to your customer after they complete a purchase on Stripe 🎉
Services we support
Senja auto-collect currently supports 24 services that can trigger a testimonial invite:
🔄 Commerce & Payment Platforms
Stripe – New customers
Shopify – Orders fulfilled
Gumroad – New sales
Woocommerce – New orders
Lemon Squeezy – New orders
ThriveCart – Products purchased
Kajabi – New purchases
Podia – New product sign-ups
👥 CRM, Email & Contact Tools
Keap – Contacts tagged
Helpscout – Conversations tagged
Intercom – User tagged
Kit – Contacts tagged
Brevo – New contacts
Active Campaign – Contacts tagged
Beehiiv – Contacts that upgrade
Flodesk – Contacts added to a segment
MailerLite – Contacts added to a group
📚 Course & Community Platforms
Circle – New community members
Heartbeat – New community members
Mighty Networks – New community members
Thinkific – Courses completed
Teachable – Courses completed
Skool – Paying members join
LearnDash – Courses completed